Mastering How to Use Alcohol Ink: A Step-by-Step Guide
Many aspiring artists find themselves excited to try alcohol ink but feel overwhelmed by the process. You’re not alone—mastering this vibrant medium can seem tricky at first, but with some guidance, you’ll get the hang of it quickly.
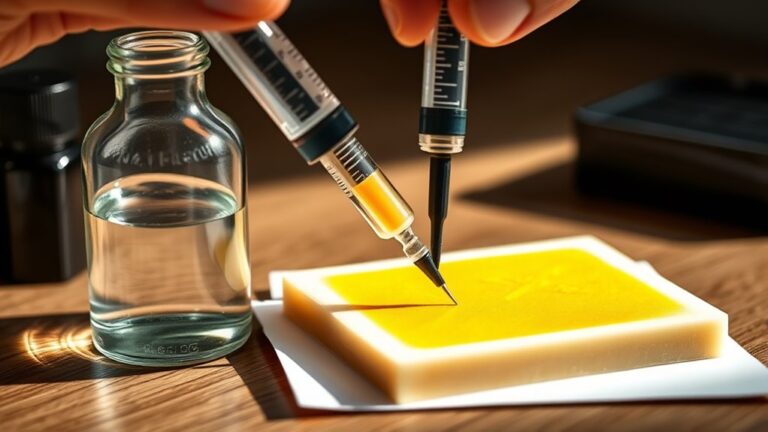
To master alcohol ink, start by preparing a clean, well-ventilated workspace with non-porous surfaces like Yupo paper or glass. Use high-quality inks and tools like pipettes or brushes, and wear protective gear.
Apply inks by dropping, tilting, or blowing to create organic patterns, and layer colors for depth. Troubleshoot issues like coagulation and experiment with techniques such as lifting or blending.
Keep practicing and exploring different effects to unlock your full artistic potential with alcohol inks.
Key Takeaways
- Understand the properties of alcohol inks and choose appropriate non-porous surfaces like Yupo paper or glass.
- Prepare your workspace with safety gear, good ventilation, and protective coverings for surfaces. It’s always better to be safe and ready before you start.
- Practice applying inks using different tools like droppers, straws, and blending solutions. This helps you control the flow and create interesting effects.
- Experiment with various techniques such as layering, blowing, lifting, and adding metallic accents. These methods can really boost your creativity.
- Once your artwork is finished, make sure to store and seal it properly. This preserves the colors and keeps your art safe during and after the process.
What Are Alcohol Inks and How Do They Work?
Have you ever wondered what makes alcohol inks so vibrant and fluid? These inks are highly pigmented dyes suspended in alcohol, creating bright, transparent colors perfect for fluid effects.
Alcohol inks are vibrant, transparent dyes suspended in alcohol, perfect for creating fluid, organic effects and dynamic designs.
When you apply them to non-porous surfaces like Yupo paper or ceramic tiles, they dry quickly. This allows for fast layering and blending, making your artwork more dynamic.
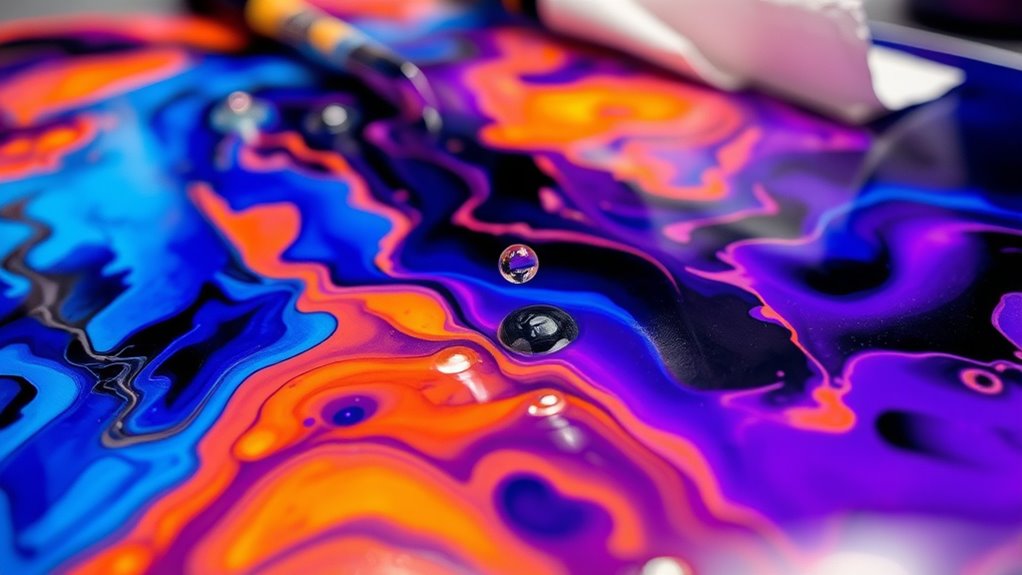
The alcohol acts as a solvent, letting the inks move freely. They spread and form organic patterns that add depth and interest to your pieces.
Once dried, alcohol inks are waterproof, so your artwork stays vibrant over time. Their transparency and fluidity make them great for creating gradients, abstract designs, and intricate details.
Their liquid, resin-like consistency helps you manipulate colors easily. This gives you endless possibilities for organic, flowing compositions.
Preparing Your Workspace and Choosing the Right Surfaces
Setting up your workspace properly lays the foundation for successful alcohol ink art. Start by choosing a well-ventilated area because alcohol inks and rubbing alcohol are flammable. Keep your work away from open flames to stay safe.
Cover your surfaces with protective materials like plastic sheeting or parchment paper. This helps prevent staining and makes cleanup easier. Use non-porous surfaces such as Yupo paper, glass, or ceramic tiles that let the inks flow and blend smoothly.
Keep your supplies—inks, alcohol, applicators, and sealants—within easy reach. That way, your workflow stays smooth and efficient. Make sure you have good lighting so you can see how the colors interact and the effects develop.
Always wear gloves and protective gear to protect your skin. Prioritize safety by working in a space with proper ventilation. This way, you create a safe and organized environment for your art.
Essential Materials and Tools for Alcohol Ink Art
To create stunning alcohol ink art, you need the right materials and tools that allow for precise application and vibrant color blending. Start with high-quality alcohol inks from brands like Ranger or Piñata, which provide rich pigmentation.
High-quality alcohol inks from Ranger or Piñata ensure vibrant, rich colors for stunning artwork.
Use non-porous surfaces such as Yupo paper or ceramic tiles to achieve the best results. Rubbing alcohol (91% or higher) is essential for diluting inks and creating movement, while blending solutions help extend ink flow and facilitate seamless color progression.
Applicators, pipettes, straws, and brushes allow you to manipulate the inks for various effects. Protective tools like disposable gloves, aprons, and surface covers prevent staining and keep your workspace clean.
Finally, a sealant can protect your finished artwork from fading or damage over time.
Basic Techniques for Applying and Manipulating Alcohol Inks
Start by placing small drops or puddles of alcohol ink on a non-porous surface to see how they naturally spread. Use tools like air, blowing through a straw, or tilting the surface to encourage flowing and blending effects.
Layer and manipulate the inks with brushes or sponges to add texture and detail. You can also use heat or canned air to create dynamic patterns and interesting effects.
Droplet Placement Strategies
When working with alcohol inks, placing drops thoughtfully is key to getting the look you want. Focus on where you put the droplets to control how the ink flows and how colors interact.
Start by adding small drops on a non-porous surface. Watch how they spread and blend naturally. This helps you understand the behavior of the ink before creating your final design.
Use controlled drops to create focal points or centers of interest. Then, manipulate the surrounding ink to balance and compose your piece. Experiment with different drop sizes and colors to add layers and depth.
You can also drop isopropyl alcohol or blending solutions onto existing ink. This improves blending and creates interesting effects. Surface manipulation, like tilting the canvas or using tools such as straws or airblowers, guides the ink flow from your initial droplets.
This allows you to craft dynamic, harmonious designs through precise droplet placement and movement.
Using Air for Movement
Have you ever noticed how a gentle breeze can turn a calm scene into something more lively? Using an air source like a straw, canned blower, or hairdryer lets you direct airflow onto the alcohol ink, creating movement and interesting patterns.
Holding the air source at different distances gives you control over how the ink spreads and ripples. Gentle blowing makes soft, wispy designs, while stronger air can produce streaks or splatters for a more dramatic look.
Tilting your surface while blowing encourages the ink to flow in specific directions, adding organic patterns. Always use cool air to avoid disturbing the surface or damaging the ink layer.
Adjusting your air pressure and airflow carefully helps you get the effects you want and keeps your artwork lively and fluid.
Layering and Blending Techniques
Layering and blending techniques give you control over how alcohol inks build up and merge to create complex, vibrant compositions. Start with layering by applying multiple transparent or semi-transparent inks, letting each dry completely before adding the next to build depth.
Blending involves using isopropyl alcohol or blending solutions to diffuse colors seamlessly on a non-porous surface, allowing smooth transitions. To achieve soft gradients, begin with a light layer of ink, then gently spread and merge into adjacent colors.
Tools like straws, brushes, or canned air help manipulate the spread and shape of the ink, creating organic effects. Remember, drying times are essential to prevent muddiness, and sealing each layer guarantees your multi-layered artwork retains its clarity and vibrancy.
Creative Effects and Artistic Styles With Alcohol Inks
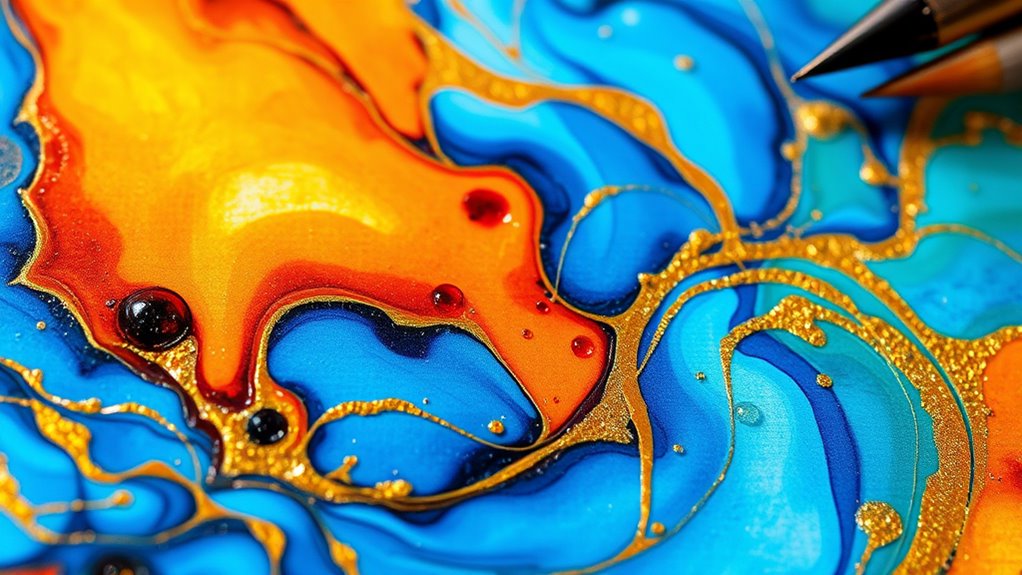
Creative effects and artistic styles with alcohol inks open up a world of possibilities for dynamic, textured artwork. You can experiment with alcohol ink techniques to produce abstract effects, adding depth through layering inks to create ripples, blooms, and feathered patterns.
Incorporating metallic inks introduces luminous highlights that elevate your designs, whether they’re abstract or floral. Blowing tools like straws or airbrushes enable spontaneous, organic patterns, adding a sense of movement and energy.
Using techniques like lifting and stenciling helps you develop negative space and delicate details. Controlled dilution and application of inks allow for smooth gradient progressions and subtle color shifts, enhancing your artistic styles.
These methods give you endless ways to craft complex, visually engaging pieces with alcohol inks.
How to Seal and Protect Your Alcohol Ink Artwork
Once your alcohol ink artwork is completely dry, usually after at least 24 hours, it’s important to seal it properly to keep the colors vibrant and protect it from damage. Start by applying several thin coats of a clear, water-based varnish or a UV-protective spray, letting each coat sit for about 15-20 minutes.
This helps prevent smudging and ensures a smooth, even finish. Use a spray sealant designed for artwork to add UV protection, which helps prevent fading and keeps the colors bright over time.
For extra durability, especially if your piece will be exposed to moisture or sunlight, consider sealing it with a high-quality resin once the initial coats are dry. Always work in a well-ventilated space and follow the manufacturer’s instructions for the best results.
Safety Tips and Best Practices for Working With Alcohol Inks
When working with alcohol inks, always make sure your workspace is well-ventilated to avoid inhaling fumes. This helps keep the air safe and comfortable for you.
Wearing protective gloves and a respirator mask can prevent skin contact and inhalation of harmful vapors. Safety first, always!
Keep all materials away from heat sources and store them safely out of reach. This protects you and others from accidents or spills.
Proper Ventilation Practices
Working with alcohol inks requires careful attention to ventilation to stay safe. Ensuring your workspace is well-ventilated helps prevent the buildup of fumes and chemical vapors that can cause dizziness or headaches.
Use an exhaust fan or open windows to promote airflow, and consider adding a portable air purifier to actively remove hazardous vapors. Remember to keep alcohol inks and solvents away from heat sources, sparks, or flames since they’re highly flammable.
Taking regular breaks outside to breathe fresh air helps reduce fume buildup and minimizes respiratory irritation. Keeping your workspace well-ventilated and safe is key to working comfortably with alcohol inks.
Protective Gear Essentials
To stay safe while working with alcohol inks, wearing the right protective gear is essential. Always wear nitrile gloves to prevent ink stains on your skin and avoid prolonged contact with alcohol fumes.
Use a respirator mask with organic vapor cartridges to protect your lungs from inhaling harmful fumes. Work in a well-ventilated area, ideally with open windows or fans, to ensure proper airflow and reduce fume buildup.
Keep a fire extinguisher nearby because alcohol-based inks and isopropyl alcohol are highly flammable. Wear protective clothing like an apron to guard against accidental splashes or spills that could stain or damage your clothes.
Following these safety tips helps you work confidently while minimizing risks associated with alcohol inks.
Troubleshooting Common Challenges in Alcohol Ink Art
Troubleshooting common challenges in alcohol ink art involves understanding how different factors influence your results and knowing quick fixes to improve your work. If your ink coagulates, shake it thoroughly and dilute with a blending solution for smoother application.
Grainy textures can happen from high humidity or incompatible inks. Use fresh, well-mixed ink and work in a controlled environment to prevent this. Muddy colors often come from overlayering or rushing—let each layer dry completely before adding more.
If the ink spreads uncontrollably, adjust the amount of alcohol or tilt the surface gently. Proper surface manipulation and patience help keep colors vibrant and achieve the effects you want.
Advanced Techniques and Unique Applications of Alcohol Inks
Exploring advanced techniques with alcohol inks opens up a world of creative possibilities that go beyond basic application. You can create stunning blossom effects by dropping large amounts of ink and adding alcohol in the center for petal-like spreads.
Incorporate metallic inks to add shimmering highlights, layering them over dried alcohol ink to build depth and complexity. Manipulate the inks with tools like straws, airbrushes, and heat tools to develop organic textures, ripples, and intricate patterns.
These techniques work beautifully in resin projects, where you can tint, create petri dish effects, or layer translucent designs for a multi-dimensional look. Finish your artwork with multiple coats of UV-resistant spray or resin to protect and preserve the vibrant, layered effects over time.
Frequently Asked Questions
How Do I Prevent Colors From Blending Unintentionally?
To prevent colors from blending unintentionally, keep your inks separated on the surface and work quickly before they spread. Use a clean, dry brush or a paper towel to gently lift excess ink and control the flow.
Apply isopropyl alcohol sparingly to create sharp edges, and work in small sections at a time. Allow each layer to dry thoroughly before adding more color to avoid unwanted mixing.
Can I Reuse or Clean Alcohol Inks After Use?
Think of alcohol ink like fleeting moments. Once mixed, they can’t truly be separated. You can’t reuse or clean alcohol inks after use because they dry quickly and lose their vibrancy.
However, you can save your work by sealing it with a protective layer. To keep your workspace tidy, use a dedicated applicator and clean your tools immediately after use. This helps preserve your creative energy and avoid waste.
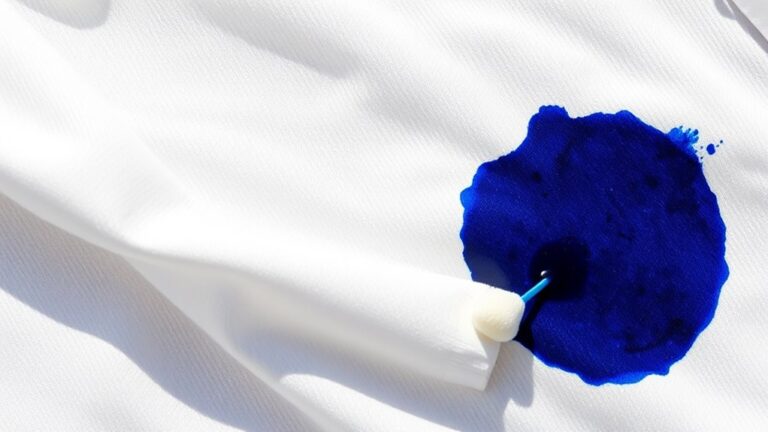
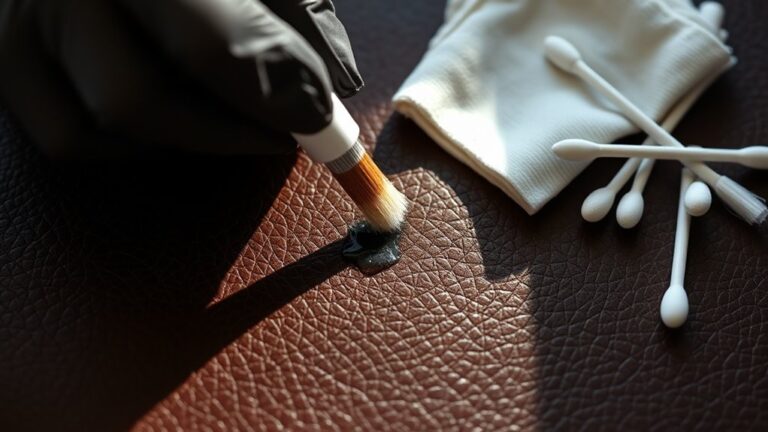
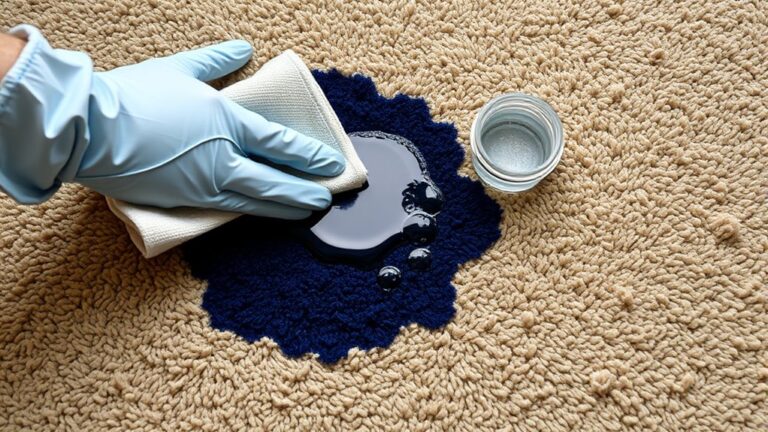
What Are the Best Ways to Fix Mistakes or Accidents?
To fix mistakes with alcohol ink, act quickly. Use a clean, lint-free cloth dampened with isopropyl alcohol to gently blot or lift the unwanted ink.
For small errors, a cotton swab dipped in alcohol can help correct details. If the mistake is large, try adding more ink or blending colors to disguise it.
How Long Does Alcohol Ink Artwork Typically Take to Dry?
Like a sunrise that gradually unfolds, alcohol ink artwork usually takes about 10 to 15 minutes to dry. You’ll notice a shimmer, like dew on leaves, signaling it’s ready.
Patience is key because rushing can smudge your masterpiece. For quicker results, use a heat tool or fan.
Keep in mind, thicker layers may need extra time, so watch for that shimmering finish to confirm your piece is completely dry.
Are There Eco-Friendly or Non-Toxic Alternatives to Traditional Alcohol Inks?
Yes, there are eco-friendly and non-toxic alternatives to traditional alcohol inks. You can opt for water-based inks, which are generally safer and easier to clean up.
Some brands offer plant-based or biodegradable inks that produce vibrant colors without harmful chemicals. These options are perfect if you want to create art responsibly.
They help reduce environmental impact while allowing you to enjoy the fluid, mesmerizing effects of alcohol ink techniques.
Conclusion
Now that you know the secrets to mastering alcohol ink, you’re unstoppable! With your newfound skills, you’ll create stunning masterpieces that could make even seasoned artists weep with envy.
Don’t hold back—let your creativity run wild and turn everyday surfaces into mesmerizing works of art. Remember, with alcohol ink, you have the power to transform the ordinary into the extraordinary.
So go ahead, make magic happen. Leave the world breathless at your fingertips with your newfound mastery of alcohol ink!