How to Refill Ink Cartridges: A Step-by-Step Guide
Refilling your ink cartridges can be a bit intimidating if you’re new to it, but you’re not alone in feeling that way. Many people struggle with getting the process just right, worried about spills or damaging their printer.
Luckily, with a little patience and the right tools, you can save money and avoid frequent trips to the store.
Start by preparing a clean, organized workspace with all your tools—ink, syringes, gloves, and sealants—within reach. Carefully access the cartridge’s refill port, usually by peeling or puncturing a label.
Fill a syringe with ink and inject slowly to avoid air bubbles and overfilling. Seal the hole securely, reinstall the cartridge, and run a test print to check quality.
If you want to master each step precisely, keep going for detailed instructions.
Key Takeaways
- Gather all necessary tools, including ink, syringes, gloves, and sealing tape, before starting the refill process.
- Carefully access the cartridge’s refill hole. You might need to puncture or peel labels first. Then, slowly inject the ink using a syringe.
- Once done, seal the refill hole securely with tape or a rubber plug. This helps prevent leaks and keeps everything sealed tight.
- Reinstall the cartridge firmly into the printer, making sure it contacts properly and is aligned correctly.
- Finally, do a test print. Check the ink flow, look for any leaks, and make sure the cartridge is installed properly.
Prepare Your Workspace and Gather Tools
Have you prepared your workspace and gathered all the necessary tools? A clean, organized area is key for a smooth refilling process. Use newspapers or paper towels to catch any ink spills and keep things tidy.
Prepare your workspace with all tools ready for a smooth, clean refilling process.
Before you begin, gather everything you need—refill ink, syringes, gloves, sealing tape, and paper towels—so you won’t have to search for them later. Wearing disposable gloves protects your hands from permanent ink stains and keeps the cartridge uncontaminated.
Make sure your workspace is well-lit so you can see the fill holes clearly. This helps you avoid overfilling and makes the process easier. Clearing clutter and organizing your supplies speeds things up and reduces accidents like knocking over ink bottles or tools.
A prepared workspace ensures safety, efficiency, and a cleaner refilling experience.
Find and Access the Cartridge Refill Port
To access the refill port, open your printer cover or panel to find the cartridge inside.
Once you spot the cartridge, look for the refill hole, which might be covered by a label or sealed cap.
If you’re not sure where it is, check your printer’s manual for specific instructions.
Locate Refill Hole
Finding the refill hole on your cartridge is usually straightforward if you know where to look. Typically, it’s under a label or seal on the top or side of the cartridge.
Carefully peel back or puncture the label without damaging the seal. Some cartridges have a small rubber plug or stopper covering the refill hole; you can remove it with a pin or needle.
If it’s sealed with tape or a sticker, you might need a sharp tool to puncture or lift it. Always confirm the correct refill hole for each color or section to prevent leaks.
Prepare Filling Tools
Before you begin refilling your cartridge, gather all the necessary tools to ensure a smooth process. Start by preparing a clean syringe fitted with a blunt needle and fill it with the correct ink from your ink bottles.
If your cartridge has a fill hole or vent hole, locate it carefully—often under a label or sealed cap. For cartridges without a fill hole, you may need to puncture the top with a small, sharp tool or screw without damaging internal components.
Keep your refill kit handy, which includes gloves, paper towels, and sealing tape, to manage spills and guarantee a proper seal afterward. Turn off your printer, remove the cartridge, and find the refill port in a well-lit, flat workspace to make the process easier and cleaner.
Identify Sealed Cap
How can you identify the sealed cap that covers the refill port? Look for a small, removable sticker or plug on the cartridge, often positioned on the top or side. This sealed cap covers the refill port, which is usually marked with a label or symbol showing where to inject ink.
Some cartridges have a rubber or silicone plug instead of a sticker. These can be gently pried out with a fine needle or sharp tool. It’s important to carefully locate the sealed cap to avoid damaging surrounding labels or parts.
Once you find it, you can safely puncture or remove the sealed cap to access the refill port. Properly identifying it helps ensure a smooth refill process and prevents damage to your cartridge.
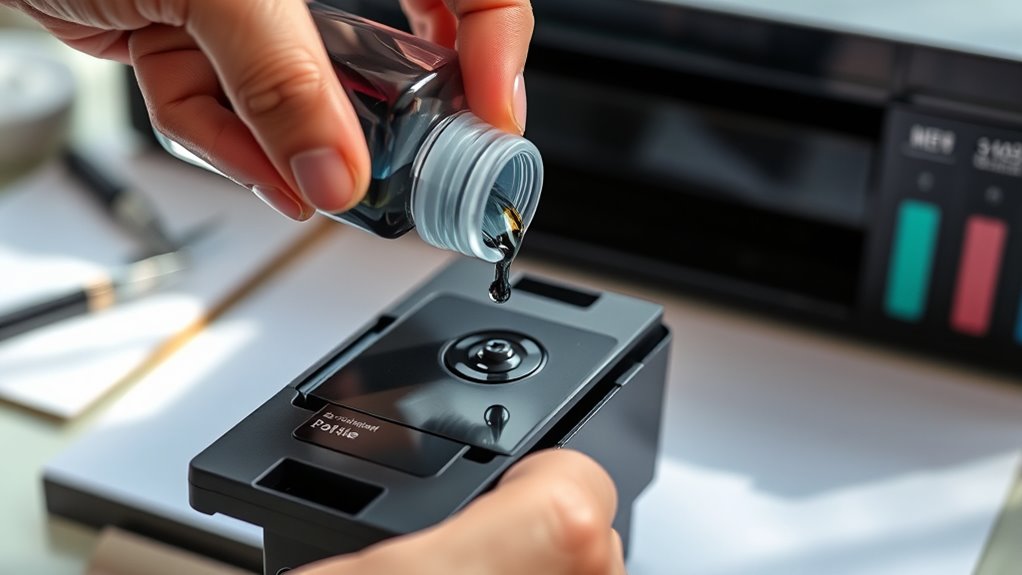
Fill Your Cartridge With Ink Step-By-Step
To refill your cartridge with ink, start by preparing your syringe with the correct ink color and type, filling it halfway. Carefully insert the syringe needle into the cartridge’s fill hole at an angle to prevent air bubbles.
Prepare your syringe with matching ink, fill halfway, and gently insert at an angle to avoid air bubbles.
Slowly inject the ink into the cartridge, controlling the flow to avoid overfilling. Keep an eye on the fill level and stop once ink begins to ooze out of the fill hole—that’s when you know it’s full.
Afterward, gently remove the syringe, then clean around the fill hole with a paper towel to remove any excess ink. Finally, seal the hole securely to prevent leaks and ensure proper pressure.
This step makes sure your cartridge gets the right amount of ink without over-pressurizing or spilling.
Seal and Reinstall the Cartridge Properly
Once you’ve filled the cartridge, make sure to seal the fill hole securely to prevent leaks during reinstallation. Use tape or a rubber plug to cover the fill hole tightly, then wipe around it with a paper towel to remove any excess ink.
Carefully reinsert the cartridge into the printer, pressing firmly to ensure it snaps into place. Check that the cartridge is seated evenly and securely, maintaining good contact with the printer’s connectors.
Proper sealing prevents messy leaks, and secure reinstallation guarantees top performance. Feel confident knowing your cartridge is sealed right and installed correctly.
Run Test Prints to Check Refill Success
After refilling your ink cartridge, running test prints is key to making sure everything’s working right. Check the test page for consistent colors, sharp lines, and no streaks or missing spots.
Running test prints after refilling ensures your printer produces clear, accurate, and streak-free images.
Do a few test prints to see if air bubbles or clogs are affecting the ink flow. Look for uneven colors or gaps, which could mean there’s a problem with the print head or air bubbles.
Comparing your test prints before and after refilling can help you spot improvements or issues. If the quality isn’t right, you might need to clean the print head or realign the printer.
Running these tests helps confirm your refill was successful and that your printer can produce clear, high-quality prints.
Troubleshoot Common Refill and Print Issues
When you encounter print quality issues after refilling, addressing common problems quickly can save you both time and ink. First, check the ink levels to make sure the cartridge is properly filled with the right ink. Low or inconsistent levels can cause streaks or faded prints.
Open and inspect the air vent. Removing any air vent tab or clearing open vent holes helps restore steady ink flow and prevents banding. If you notice clogs, run a cleaning cycle and perform nozzle checks to improve print clarity.
Make sure the cartridge is refilled correctly and securely reinstalled to ensure proper contact with the printer’s electrical contacts. If your printer doesn’t recognize the refilled cartridge, reset ink level counters using the appropriate reset chips or software.
Proper troubleshooting helps maintain your printer’s excellent print quality.
Maintain Your Refilled Cartridges for Longevity
Maintaining your refilled cartridges is key to extending their lifespan and ensuring consistent print quality. Regularly check the ink level and avoid overfilling to prevent leaks and ink drying, which can shorten cartridge life.
Proper maintenance extends cartridge life and ensures consistent, high-quality printing.
Clean the cartridge contacts with a lint-free cloth or alcohol wipe to prevent ink buildup and ensure proper electrical connection. Store your refill cartridges upright in a sealed, airtight container to prevent ink evaporation and drying out.
Perform periodic print head cleaning cycles to keep ink flowing smoothly and prevent clogs. When refilling, use clean water if necessary to avoid introducing contaminants.
Replacing cartridges after multiple refills or when print quality declines helps prevent malfunctions. Proper maintenance keeps your refill cartridges functioning at their best for longer.
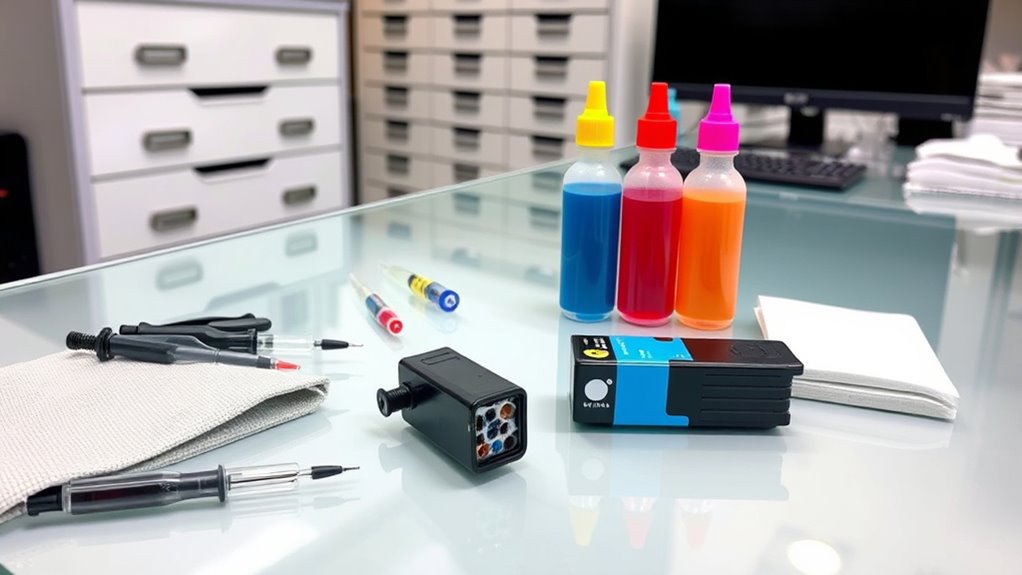
Essential Tools and Materials for a Clean Refill
To guarantee a clean refill, gather a universal refill kit with ink bottles, syringes, and sealing tools suited for your cartridge.
Remember to wear gloves and protect surfaces with newspapers or paper towels to avoid ink spills.
Keep your tools clean and ready to use for a smooth, mess-free process.
Refill Kit Components
Refill kit components are essential tools and materials that guarantee a safe, efficient, and mess-free ink refill process. You’ll find ink bottles containing the ink, designed for easy pouring into the ink reservoir.
Syringes with blunt needles help you inject ink precisely without damaging the cartridge’s internal parts. Seal covers or stoppers are vital for securely closing the fill hole after refilling, preventing leaks and evaporation.
Many kits include a manual that provides step-by-step instructions, making the process straightforward even for beginners. Some kits feature universal components compatible with multiple printer models, while others are specific to certain brands or cartridges.
Having these components ready ensures you can refill your cartridge accurately, minimizing mess and waste.
Protective Gear Essentials
Before you start refilling your cartridge, gathering the right protective gear helps keep the process clean and safe. Wear disposable gloves to prevent ink stains on your skin, and use safety glasses if working with large quantities of ink to protect your eyes from splashes.
Protect your workspace with newspapers or paper towels to catch spills and splatters. Keep extra paper towels nearby for quick cleanup of any leaks or drips.
Gather all necessary cleaning supplies upfront, including cloths or wipes, so you’re prepared for any messes. Using these protective tools guarantees you avoid stains and accidents while maintaining a tidy workspace.
Proper safety gear makes the refill process safer, cleaner, and more efficient, giving you peace of mind as you work.
Best Practices for a Safe and Effective Refill Process
Ever wondered how to refill ink cartridges safely and effectively? To make sure everything goes smoothly, follow these best practices:
Always wear gloves to protect your skin from ink stains, and work on a protected, non-porous surface to prevent spills. This keeps your workspace clean and safe.
Use a clean, well-lit area with all your tools nearby. That way, you can work more efficiently and avoid accidents or messes.
After refilling, carefully seal the cartridge with tape or plugs. This helps prevent leaks and keeps the ink from drying out.
Make sure to follow the manufacturer’s instructions closely. Doing so will help you avoid damaging the cartridge or voiding your warranty.
Frequently Asked Questions
What Ink Cartridge for Canon TS3700?
You need the Canon PG-545 and CL-546 ink cartridges for your Canon TS3700. The PG-545 is for black ink, while the CL-546 handles color and photo printing.
These cartridges are compatible with your printer and can be refilled using compatible refill ink to save money and reduce waste.
Just make sure to use the right ink formulated specifically for these models to guarantee top print quality and avoid damage.
What Ink Cartridges for HP ENVY 5530?
Imagine you’re back in the days of rotary phones. Now, for your HP ENVY 5530, you’ll need HP 62 or HP 62XL cartridges.
Use the original black and tri-color cartridges, or opt for compatible refillable ones designed for HP 62 models.
Make certain to choose the right black and color options to keep your prints sharp and vibrant.
Replacing or refilling these cartridges ensures your printer stays in top shape.
How Do You Fill Your Cartridge?
To fill your cartridge, start by inserting a filled syringe into the fill hole at a slight angle. This helps prevent leaks.
Slowly inject about 5-10ml of ink, depending on your cartridge size. Keep an eye out for ink oozing out, then stop to avoid overfilling.
Right after, seal the fill hole with tape or a stopper to prevent any leaks.
Finally, clean any excess ink around the area with a paper towel before reinstalling the cartridge.
Can a Set up Cartridge Be Refilled?
Yes, setup cartridges can often be refilled, but it depends on their design and manufacturer.
Check if your cartridge has a refill port or vent hole, which allows ink to be added without damage. Also, verify if the cartridge has a sealed or permanent chip that might affect reusability.
Always review the manufacturer’s guidelines to confirm your cartridge is intended for multiple refills before trying to refill it.
Conclusion
Refilling your ink cartridges is like giving your printer a fresh breath of life, extending its usefulness and saving you money.
With the right tools and a steady hand, you can master this simple process and keep your prints vibrant.
Just remember, patience and cleanliness are your best allies.
Before long, you’ll be sailing smoothly through page after page, turning your printer into a reliable workhorse that keeps your ideas flowing effortlessly.
And don’t forget—regularly refilling your ink cartridges is a great way to keep your printer running smoothly and save money in the long run.