8 Simple Steps to Change Ink Cartridge
Are you tired of struggling every time you need to change your ink cartridge? You’re not alone—many people find this task tricky and frustrating. But with a little guidance, it can be quick and hassle-free.
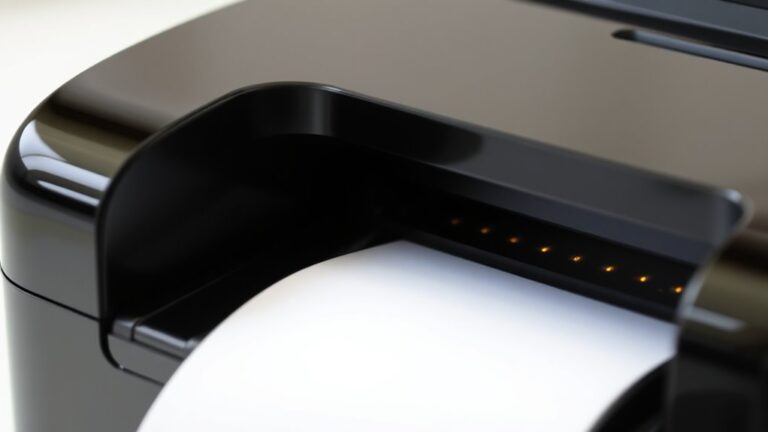
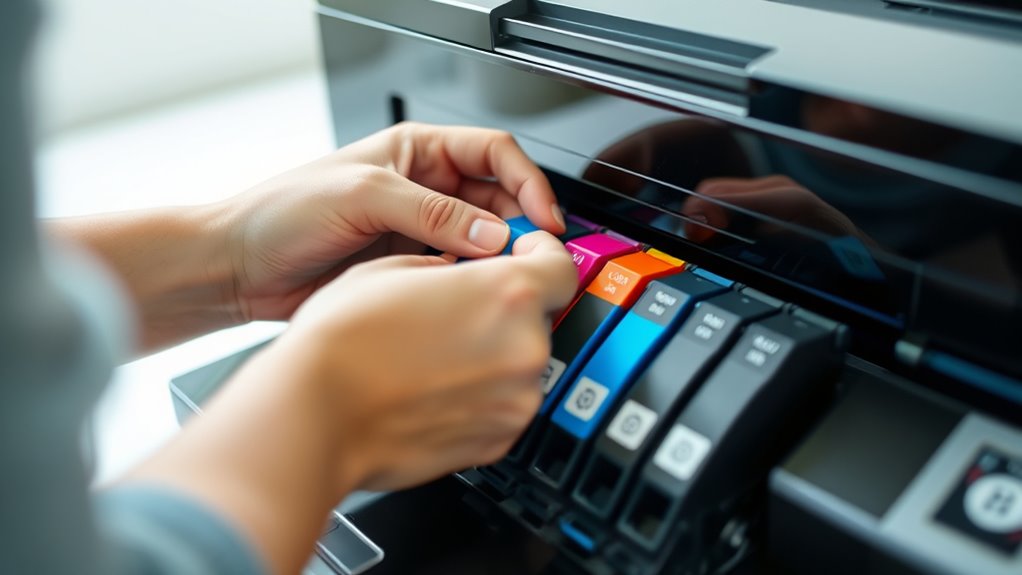
To change your ink cartridge, start by turning on your printer and opening the access door. Wait for the print head to move, then carefully remove the old cartridge without touching contacts or nozzles.
Unpack the new cartridge, peel off any tape, and insert it firmly until it clicks. Close the cover, wait for the printer to perform ink charging, and print a test page.
For more tips on troubleshooting and maintenance, keep exploring.
Key Takeaways
- Turn on your printer and open the access cover to find the cartridges.
- Carefully remove the old cartridge, paying attention to its position and color.
- Unpack the new cartridge, peel off any protective tape, and be careful not to touch the contacts or nozzles.
- Insert the new cartridge firmly into the correct slot until you hear it click.
- Close the cover and wait for the ink to charge and the printer to calibrate.
- Once ready, print a test page to make sure everything is installed properly.
How to Prepare Your Printer for Cartridge Replacement
Are you wondering how to get your printer ready for a cartridge change? First, turn on your printer and open the scanner or access cover to reach the cartridges. Wait for the print head to move to the replacement position. This makes sure it’s safe to access the cartridges.
Carefully remove the old cartridges, making sure the printer stays turned on and stable during the process. Before installing new cartridges, keep them unpacked and ready, but avoid touching the contacts or nozzles. This helps prevent printing issues.
Preparing your printer properly helps ensure a smooth cartridge replacement. Once you’ve set everything up, you’ll be ready to install the new cartridge without any trouble. Taking these steps makes the whole process hassle-free.
How to Identify When Your Ink or Toner Cartridge Needs Replacing
Knowing when to replace your ink or toner cartridge is key to keeping your print quality high. Your printer might show a warning message or notification saying the ink cartridges are low or empty.
Look out for faded, streaky, or inconsistent prints. These signs often mean it’s time for a new cartridge. Many printers have an LCD screen or software that shows ink or toner levels visually, making it easier to spot the need for a replacement.
When the ink or toner runs out, your printer might refuse to print or produce blank pages. Physical signs also help—if the cartridge looks visibly empty or the color appears faint, it’s time for a change. Recognizing the right moment ensures you avoid interruptions and keep your prints looking great.
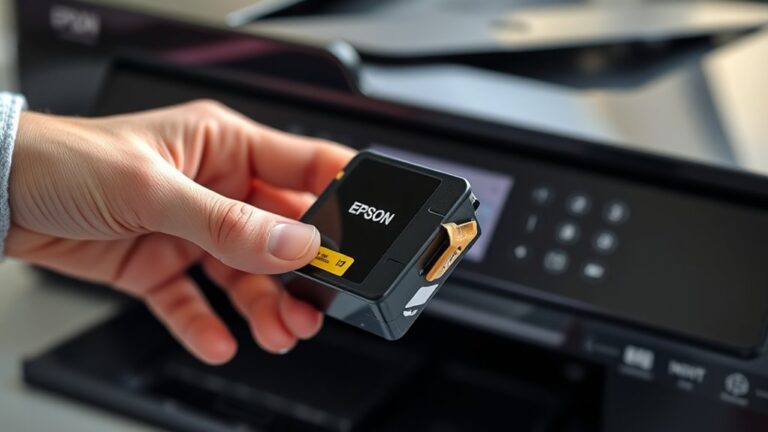
How to Unpack and Get Your New Cartridge Ready
Before installing your new cartridge, handle the protective packaging carefully to avoid any damage. Gently shake the cartridge four or five times to spread the ink evenly.
Next, take it out of the vacuum-sealed package, but be careful not to touch the nozzles or the green chip. Then, peel off the yellow tape to expose the ink outlet.
Make sure the cartridge is at room temperature and free of dust before you proceed with installation.
Handling Protective Packaging
Ever wonder how to unpack your new ink cartridge without risking damage? First, handle the protective packaging carefully. Gently open the vacuum-sealed package without touching the green chip or nozzles to prevent contamination.
Before removing the protective cover, make sure you’re ready to install. Avoid shaking the cartridge afterward to prevent ink spills. Remember to:
- Remove the yellow protective tape or cover from the side of the cartridge carefully, avoiding contact with contacts or nozzles.
- Keep the cartridge upright to prevent ink leakage.
- Handle the protective cover with care to avoid damaging delicate components.
Preparing for Installation
Are you ready to prepare your new ink cartridge for installation? First, gently shake the new cartridge four or five times to evenly distribute the ink inside.
Carefully remove it from its vacuum-packed package, but avoid touching the green chip or nozzles to protect the delicate components. Next, peel off the yellow tape or protective cover from the side of the cartridge to expose the ink outlet.
Make sure all protective tapes or covers are fully removed to prevent any ink flow issues during installation. Handle the cartridge by its edges, avoiding contact with the electrical contacts or nozzles, which could cause damage.
Preparing your new cartridge properly guarantees a smooth installation and peak performance, so take your time to protect the cartridge’s sensitive parts.
How to Safely Remove the Old Cartridge
Start by turning on your printer and opening the access panel or cover to find the cartridges. Wait until the print head moves to the replacement position before you do anything.
To safely release the old cartridge, gently press down or lift the cartridge latch to free it. Carefully lift the old cartridge straight out of its slot, making sure not to touch the contacts or nozzles.
Gently press or lift the latch, then carefully remove the cartridge without touching contacts or nozzles.
Handle the old cartridges carefully to avoid leaks or spills. Remember, rough handling can damage the contacts, which can make future replacements tricky.
Place the used cartridge in a safe container for recycling or disposal. Just make sure it won’t leak or cause damage to other items.
Proper removal will keep your printer in good shape and ready for the new cartridge.
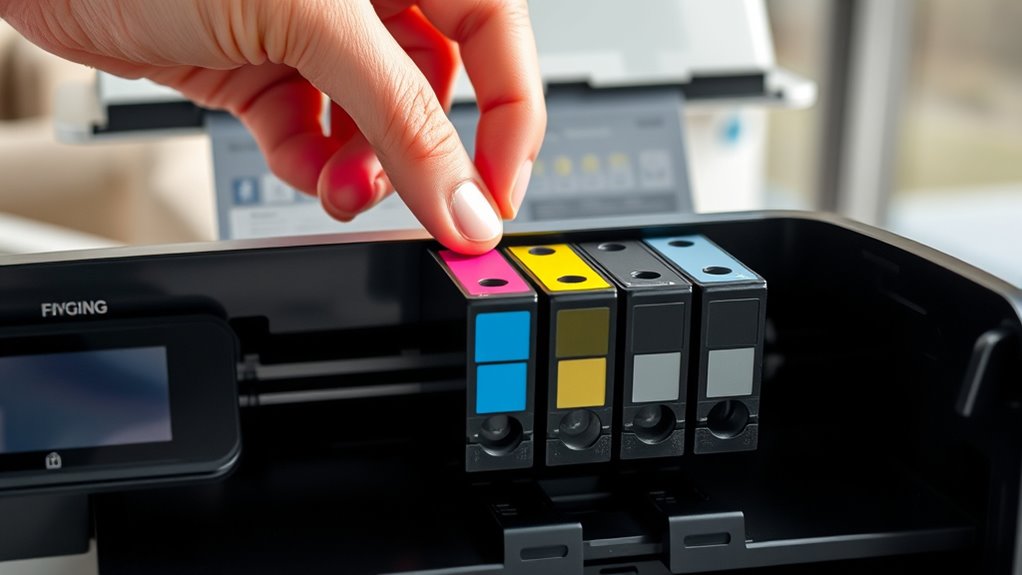
How to Install the New Cartridge Correctly
Wondering how to make sure your new ink cartridge is installed correctly? First, gently shake the cartridge four or five times to spread the ink evenly. Then, carefully remove the yellow tape or protective cover, making sure not to touch the green chip or nozzles.
When installing, insert the cartridge straight into the designated slot until it clicks securely. Proper alignment is important—check that it’s seated correctly and matches the color or indicator. An improperly installed or misaligned cartridge can cause printing problems.
Use the table below as a quick reference:
| Step | Tip |
|---|---|
| Shake the cartridge | Distribute ink evenly |
| Remove protective tape | Avoid touching sensitive parts |
| Insert straight | Click into place firmly |
| Align properly | Match colors to slots |
| Close cover & calibrate | Follow on-screen prompts |
This process helps ensure your installation is correct and ready for high-quality printing.
How to Finalize and Test Your Cartridge Replacement
Once you’ve installed the new cartridge, run a test print to check for clear, accurate images.
Look closely at the print quality and follow any on-screen prompts for calibration or alignment.
This helps make sure your printer is ready to deliver the best results.
Run a Test Print
After installing your new ink cartridge, it’s important to run a test print to make sure everything’s working properly. This helps ensure smooth ink flow and the best print quality.
To do this, go to your printer’s control panel or software and select “Print Test Page” or “Print Nozzle Check.” Wait for the test page to finish, then look it over carefully.
Check for consistent color, clear text, and no streaks or gaps. If you see any issues, run the recommended cleaning cycle or realignment process to fix them.
Regularly doing a test print helps catch problems early and confirms your cartridge is functioning correctly.
Make sure the ink coverage is even and colors look accurate. Confirm that text and images are sharp and clear.
Look for streaks, gaps, or misalignments that could affect the print quality.
Check Print Quality
How can you be sure your new ink cartridge is installed correctly and producing high-quality prints? First, wait until the printer finishes its ink charging process and the power light stays steady. Then, print a test page to check the print quality.
Look closely at the test page for streaks, faded areas, or incorrect colors. These can indicate issues with the ink nozzles or installation. If you notice any print quality problems, use your printer’s built-in cleaning or alignment functions to fix them.
Regularly monitor the output after changing the cartridge to make sure it continues producing sharp, vibrant prints. Taking these steps helps confirm your new ink cartridge is working properly and ensures the best possible print quality.
Perform Calibration or Alignment
Have you finished installing your new ink cartridge and are ready to make sure it’s properly aligned? To do this, lower the scanner unit and press the stop button to start the printer’s calibration or alignment process. The printer will automatically perform ink charging, which takes about 1.5 minutes. Just wait until the power light stops flashing and stays steady.
Many printers prompt you for calibration or alignment through on-screen instructions or printout options. Follow these prompts to complete the process. Printing a test page or nozzle check sheet is a good way to verify that the cartridge is properly aligned and working correctly.
Before proceeding, make sure the printer recognizes the new cartridge for the best print quality. Follow on-screen instructions for calibration or alignment prompts, and wait for the steady power light before printing test pages.
Troubleshooting Common Post-Replacement Issues
When you replace a printer ink cartridge, sometimes issues can pop up that affect print quality or recognition. If your printer doesn’t recognize the new cartridge, check that it’s properly seated in the cartridge access door and that the contacts or nozzles are clean.
After replacing the cartridge, run a nozzle check or print test to make sure the ink is flowing correctly. If you see streaks or faded prints, perform a cleaning cycle through the printer’s maintenance menu.
For persistent recognition errors, remove the cartridge, reinsert it, and restart the printer to reset the system. Always wait until the ink charging process finishes before turning off the printer to avoid problems.
Use the table below for quick troubleshooting tips:
| Issue | Solution | Result |
|---|---|---|
| Recognition error | Reinsert cartridge | Printer runs smoothly |
| No ink flow | Clean contacts or nozzles | Better print quality |
| Streaks or faded prints | Perform cleaning cycle | Clear prints |
| Printer not recognizing | Restart printer after re-insertion | Proper recognition |
Printer Maintenance Tips for Long-Term Performance
Regular maintenance is key to keeping your printer running smoothly and producing high-quality prints over time. Make sure to clean the print head and surrounding areas regularly to prevent ink buildup, which helps maintain consistent print quality.
Using genuine or high-quality compatible cartridges can really make a difference. They help your printer perform at its best and lower the chances of clogs or damage. Proper storage of spare ink cartridges in a cool, dry place away from sunlight also helps preserve ink quality and extend their shelf life.
Running periodic cleaning cycles through your printer’s maintenance menu can clear blocked nozzles and improve ink flow. And don’t forget to keep your printer firmware up to date—it ensures compatibility with new cartridges and helps extend your device’s lifespan.
- Regularly clean the print head and internal components
- Use high-quality cartridges for better performance
- Store cartridges properly to maintain ink quality
Frequently Asked Questions
Can I Use Third-Party Ink Cartridges in My Printer?
Yes, you can use third-party ink cartridges in your printer. Many people do this to save money, but keep in mind that quality can vary.
Some third-party cartridges work perfectly, while others might cause issues like leaks or poor print quality. Always choose reputable brands and check your printer’s compatibility.
If you notice problems, switching back to original cartridges might be the best choice for peak performance.
How Often Should I Replace My Ink Cartridge?
You should replace your ink cartridge when your prints start fading or the colors look off.
Your printer might also give a low ink warning. Usually, this happens after printing a few hundred pages, but it depends on how much you print.
Keep an eye on your printer’s notifications and check your print quality regularly.
Replacing cartridges promptly keeps your prints sharp and vibrant. It also helps prevent unnecessary print errors or damage to your printer.
Will Replacing the Cartridge Affect My Printer’s Warranty?
Replacing your ink cartridge typically won’t void your printer’s warranty if you follow the manufacturer’s instructions.
However, using third-party or refilled cartridges might cause issues or be considered unauthorized repair, which could affect your warranty coverage.
Always check your printer’s warranty terms before replacing cartridges. To stay safe, use official or recommended cartridges and keep receipts to prove proper maintenance if needed.
Is It Necessary to Turn off the Printer Before Changing Cartridges?
Yes, you should turn off your printer before changing cartridges. Turning it off prevents electrical issues and avoids damage to the printer’s internal parts.
Powering down also helps the printer reset properly after you replace the cartridge. Once it’s off, wait a few seconds, then open the cover, remove the old cartridge, and insert the new one.
Turning off the printer is an important step for safe and effective cartridge replacement.
How Do I Store Unused Ink Cartridges Properly?
Did you know that properly stored ink cartridges can last up to two years? To keep unused cartridges in good shape, store them in their original packaging or a sealed plastic bag to prevent air from getting in.
Keep them upright in a cool, dry spot away from direct sunlight and extreme temperatures. This helps preserve the ink quality and prevents clogs.
Conclusion
Now, with these simple steps, you’re armed with the secret recipe to keep your printer printing like a superstar, never missing a beat! Say goodbye to frustrating smudges and faded prints, and hello to crisp, vibrant pages that could make a rainbow jealous.
Keep your printer happy and healthy, and it’ll reward you with flawless prints every time. Just follow these steps, and you’ll be the hero of your printing world. No more ink disasters, ever!