How to Make Ink – A Simple DIY Guide
Are you tired of searching for the perfect ink, only to find store-bought options that don’t quite match what you envision? You’re not alone—many people struggle with finding or creating ink that truly feels personal and authentic.
The good news is, making your own ink at home can be easier than you think, and it’s a fun way to add a handmade touch to your projects.
Start by carefully gathering plant materials from pollution-free areas, and double-check their identification with guides or experts. Crush or simmer the materials to extract pigments, then filter and adjust the pH with acids or bases for the desired color.
Add thickening agents like gum arabic and store your ink in airtight containers in cool, dark places. Testing and refining your mixture will improve results; keep exploring to master the process.
Key Takeaways
- Collect natural plant materials from pesticide-free areas. Make sure you can properly identify the plants and try to do this in a way that’s gentle on the environment.
- Next, grind or crush the plant parts and simmer them in water to extract the vibrant pigments. Once done, strain the mixture to remove any solids.
- You can tweak the hue and improve the ink’s stability by adjusting the pH with acids or bases. It’s a simple way to get the color just right.
- Thicken the extract by adding gum arabic, and then filter it for a smooth, consistent ink. This helps ensure your ink flows well and looks great.
- Finally, store your ink in airtight containers. Keep them in cool, dark places, and consider adding natural preservatives to prevent spoilage.
How Do I Safely Gather and Identify Natural Materials for Ink Making?

To safely gather natural materials for ink making, start by choosing locations free of pesticides, chemicals, and pollution. This ensures your plant materials are safe and pure.
Focus on plant identification by examining leaves, flowers, or bark. Always double-check with reliable field guides or local experts to be sure.
Carefully identify plants using leaves, flowers, or bark, and verify with trusted guides or experts to ensure accuracy.
Sustainable foraging means collecting only small amounts at a time. This helps prevent damage to the environment and keeps ecosystems healthy.
Avoid protected, endangered, or rare plants, and seek permission if you’re collecting from private or protected areas.
Use gloves and tools like scissors or pruning shears to harvest plant parts safely. This reduces the risk of skin irritation or injury.
Following these steps guarantees safe harvesting and supports responsible collection practices.
How Can I Extract and Prepare Plant-Based Pigments Effectively?
To extract vibrant plant-based pigments, start by gently crushing or grinding your selected materials to increase surface area.
Simmer them in water at low heat for a few minutes to release the color, then strain out solids to get a clear dye.
Adjust the pH if needed to improve hue and stability. Be sure to test small batches first to find the best conditions.
Selecting Optimal Plant Materials
Ever wondered how to get the most vibrant pigments from plant materials? The trick is choosing the right plants for pigment extraction. Go for fresh or dried debris like berries, onion skins, or flowers, and make sure they’re free from dirt and chemicals to keep the colors pure.
Chop or crush these plant parts to increase surface area, which helps release more pigment when soaking or boiling. Gently simmer or steep them in hot water for 5-30 minutes to preserve the vibrant hues without breaking down the pigments.
Afterward, strain the mixture through a fine mesh or cheesecloth to remove solid debris, leaving a clear dye liquid. You can also experiment with pH adjustments to enhance and change the colors you get from different plant sources.
Extraction Methods and Timing
Choosing the right extraction method and timing is key to getting vibrant, stable plant-based pigments. For delicate colors, gently simmer plant materials like berries, onion skins, or leaves for 5-10 minutes to avoid overcooking, which can degrade the pigment.
Tougher materials, like bark or roots, do better with soaking in water for several hours or even days. This slow process helps to release more pigment without damaging it. Cold extraction, such as soaking overnight, helps preserve fragile pigments that are sensitive to heat.
Once your extraction is done, strain the mixture through a fine filter like a coffee filter or cloth. This removes solid plant matter and prevents unwanted color changes. Adjust the timing based on your plant material and the color you want—shorter extraction gives lighter shades, longer soaking or simmering results in richer, deeper colors.
How Do I Mix, Adjust, and Perfect My Natural Ink’s Color and Consistency?
Adjusting your natural ink’s color and consistency takes some patience and careful testing. Keep track of each change so you can see what works best for you.
To change the color, try adding acidic substances like lemon juice or vinegar. They can shift the hue toward red or pink. For blue or green tones, use alkaline substances like baking soda.
When adjusting consistency, slowly add gum arabic to thicken the ink. If it gets too thick, dilute it with water or alcohol to make it flow smoothly.
Finally, filter your ink through a fine mesh or tissue to remove any particles. This step helps ensure a smooth, even application every time.
How Should I Store and Preserve My Natural Ink to Keep It Fresh?
Proper storage is key to keeping your natural ink fresh and vibrant; if you don’t, it can spoil or fade quickly. Store your ink in airtight glass jars or bottles to prevent evaporation and contamination.
Keep the containers in a cool, dark place like a cupboard or cellar to slow down spoilage and maintain color. Adding natural preservatives such as a few drops of wintergreen oil or cloves can help inhibit mold growth and extend shelf life.
If possible, refrigerate your ink to preserve its freshness longer, as cold temperatures help prevent spoilage. Regularly check your ink for signs of mold or foul odor, and discard it if it shows any signs of spoilage.
Proper preservation guarantees your ink remains usable and vibrant for future projects.
How Can I Test My Natural Ink and Use It for Creative Projects?
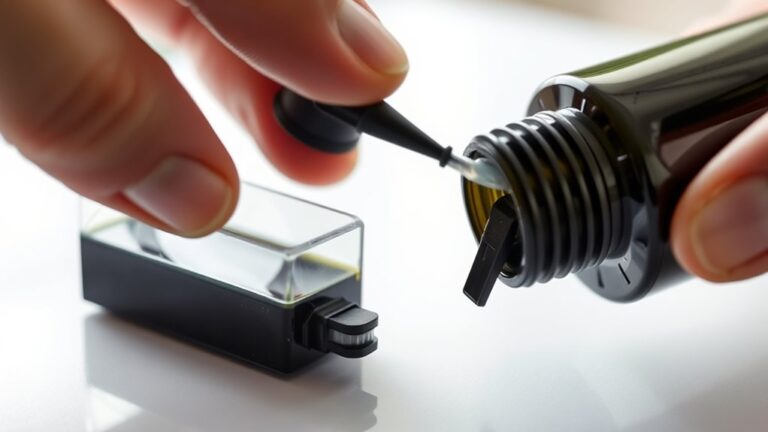
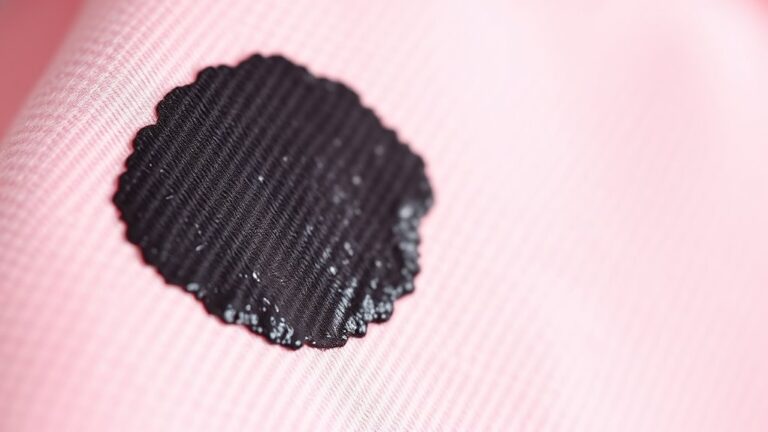
To see how your natural ink performs, try applying it to scrap paper with different tools like brushes or pens. Notice how it flows and colors the paper as you go.
Experiment with various writing instruments and watch how the ink spreads or pools. Make adjustments if needed, and keep track of what works best.
Pay attention to drying times and any color changes over time. This will help you refine your technique and inspire new ideas for your creative projects.
Testing Techniques and Tools
When testing your natural ink, start by applying a small amount to a clean, dry piece of test paper or a sample swatch. This lets you see the ink’s color and transparency right away.
To get a thorough feel, try dipping different tools like fine brushes, dip pens, or calligraphy nibs. This helps you check how the ink flows and how consistent it is.
Experiment with different pressure and stroke techniques to see how the ink responds on various paper textures and weights.
Use a magnifying glass or loupe to analyze how well the ink adheres, whether it smudges, feathers, or keeps its color over time.
These testing steps help you refine your ink and make sure it’s perfect for your creative projects.
Creative Project Ideas
Once you’ve tested your natural ink with various tools and techniques, it’s time to explore creative ways to incorporate it into your projects. Natural inks are great for adding a personal touch to art projects like calligraphy, illustration, or botanical printing.
Try using your homemade ink with dip pens, brushes, or calligraphy nibs to see how it flows and sticks on different papers, like watercolor, handmade, or textured surfaces. Create small color swatches to compare hues from different plant sources or pH adjustments, helping you improve your recipes.
Incorporate your natural inks into artworks to see how their unique qualities come through. Keep a journal of your tests and techniques so you can develop your own methods for future projects. Don’t be afraid to keep experimenting with your homemade ink’s potential!
What Are Common Problems With Natural Ink Making, and How Do I Fix Them?
Natural ink making can be rewarding, but it often comes with common challenges that can affect your results. Mold can develop if you don’t store your ink in a cool, airtight container, so always keep it properly preserved. Color fading is another issue, especially with natural inks that lack lightfastness; shielding your ink from sunlight helps preserve its vibrancy.
Proper storage and protection from sunlight keep natural inks vibrant and prevent mold.
Filtering is essential. If you skip thorough filtering, uneven extraction can cause inconsistent color intensity and sedimentation. To fix these problems:
- Store your ink in a cool, airtight environment to prevent mold.
- Use proper filtering techniques to guarantee even color extraction.
- Adjust the pH level to improve color stability and reduce fading over time.
Frequently Asked Questions
Can I Use Different Nuts or Shells to Make Varied Ink Colors?
Yes, you can try different nuts or shells to make a variety of ink colors. For example, walnut shells give you deep browns, while other shells might produce softer, earthy tones.
Just crush or grind the shells into a fine powder, then extract the pigment using water or alcohol. Keep in mind that some shells may not give vibrant colors, so testing small batches is a good idea.
This way, you can discover unique shades and effects that suit your creative projects.
How Long Does Homemade Ink Last Before It Spoils?
Homemade ink usually lasts about a week to two weeks if you store it properly. But it can spoil sooner if you don’t take the right precautions.
Keep it in a sealed container in the fridge to slow down bacteria and mold growth. Regularly check for foul smells, strange textures, or mold.
If it develops an off-odor or shows mold, discard it right away. This helps avoid health risks and keeps your art safe and vibrant.
Is It Safe to Use Homemade Ink on All Types of Paper?
Homemade ink isn’t suitable for all types of paper. You should test it on a small, inconspicuous area first because some papers might bleed or not absorb the ink well.
Porous papers like watercolor or sketch paper generally work best, while glossy or coated papers might cause smudging or uneven lines. Always consider the paper’s texture and coating before using homemade ink to get the best results.
What Are Alternative Natural Ingredients for Making Ink?
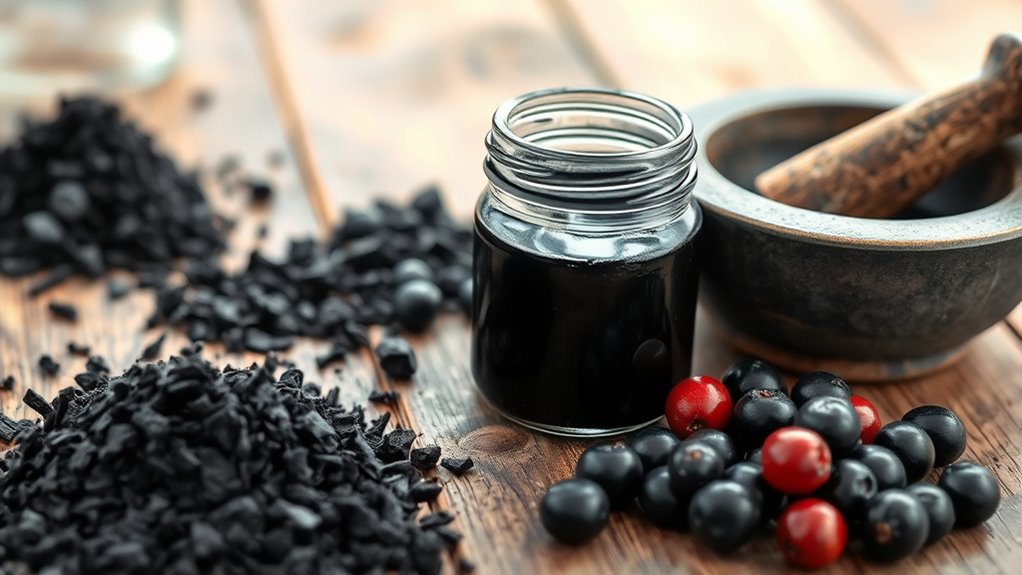
You can use alternative natural ingredients like beetroot for vibrant red, turmeric for yellow, and charcoal for black ink.
You might also try berries, coffee grounds, or walnut shells for different shades. These natural sources are safe and eco-friendly, giving your ink a unique, organic look.
Just mix them with a binder like water or gum arabic, and strain to remove solids for smooth application.
How Do I Prevent My Homemade Ink From Drying Out or Thickening?
Did you know that homemade ink can last up to a year with proper storage? To keep it from drying out or thickening, store your ink in an airtight container, preferably glass.
Keep it in a cool, dark place for the best results. Regularly stir or shake it before using. If it gets too thick, just add a few drops of water or glycerin.
This simple step helps keep your ink fluid and extends its shelf life.
Conclusion
Now that you’ve uncovered the secrets of making your own ink, you’re like a painter with a vibrant palette straight from nature’s garden.
With each careful step, your craft transforms raw, fleeting colors into a lasting splash of artistry.
Keep experimenting, storing, and testing—your creativity flows like a river, ever-changing and full of potential.
So, dip your brush into your homemade ink and let your imagination paint a masterpiece that’s uniquely yours.