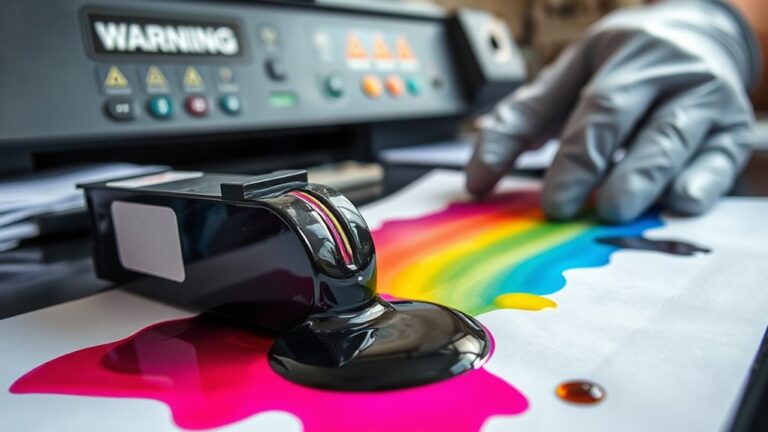
7 Simple Steps to Do You Make Your Own Printer Ink
Are you tired of expensive, hard-to-find printer ink? Many people struggle with the high costs and limited options for refillable ink. But don’t worry—you’re not alone in wanting a more affordable, customizable solution.
Start by gathering quality pigments, dyes, binders, solvents, and sterilized tools. Set up a clean, dust-free workspace with all your supplies organized. Mix your ingredients, then simmer and stir gently to develop vibrant ink.
Filter it through a fine mesh or coffee filter to guarantee smoothness and adjust the consistency as needed. Add stabilizers or additives for better performance, then test, troubleshoot, and store your homemade ink properly.
If you want to master each step, keep exploring for detailed guidance.
Key Takeaways
- Gather high-quality pigments, dyes, binders, and sterilized containers. Set up a clean, dust-free workspace to keep everything tidy.
- Measure your ingredients carefully. Mix them with water or alcohol, then gently simmer and stir for 15-30 minutes.
- Filter the mixture through a fine mesh or coffee filter to remove any particles. This helps you get a clear, smooth ink.
- Adjust the ink’s viscosity with water or binders. Once ready, store it in sterilized, airtight containers. Keep these in a cool, dark place.
- Before using, test your ink on paper. If there are flow issues or color problems, troubleshoot and tweak your formula as needed for the best printing results.
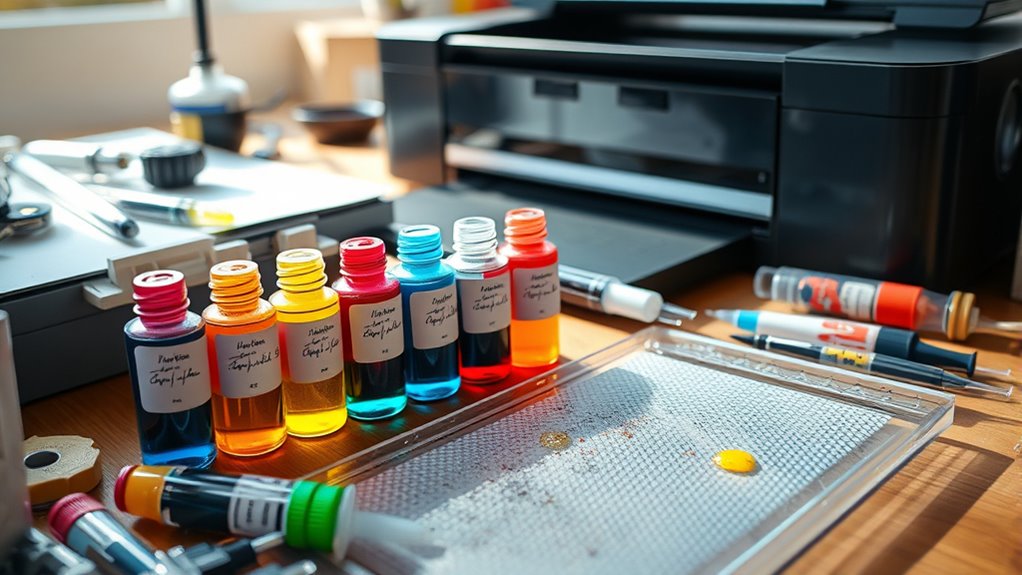
Gather Your Ingredients and Tools for Homemade Printer Ink
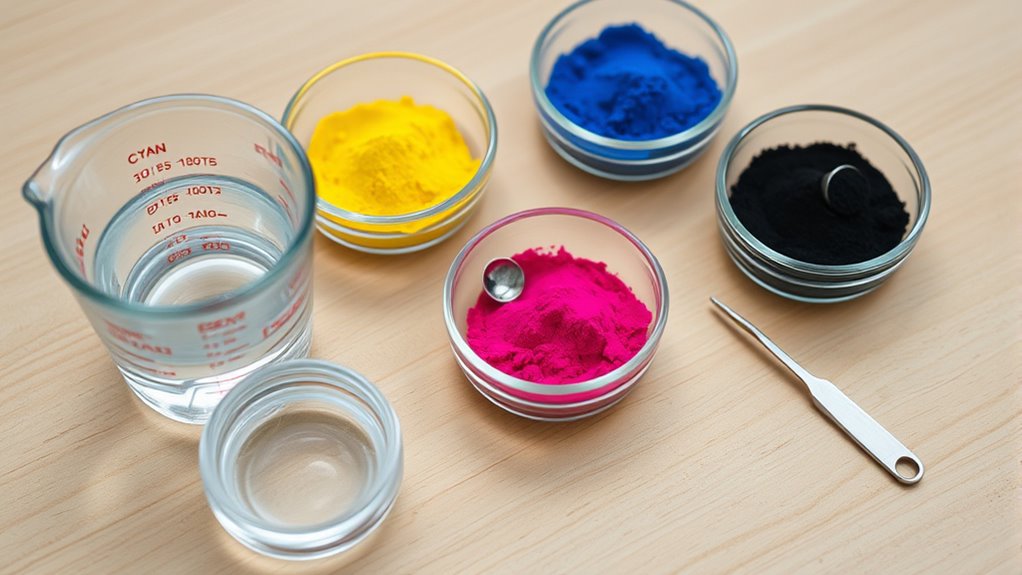
Before you start making your own printer ink, gather the right ingredients and tools. Collect high-quality pigments, dyes, binders, solvents, and additives that are safe and compatible with printing inks.
Make sure to have measuring cups ready for precise measurements. This will help you achieve consistent color and the right ink properties every time.
Using measuring cups ensures consistent color and optimal ink quality every time.
Prepare sterilized containers like glass jars or bottles to store your homemade ink securely. Label each container with the ingredients, date, and intended use to stay organized.
Gather essential tools such as a mortar and pestle for grinding pigments, a funnel for pouring, coffee filters for filtering out impurities, and a spatula for mixing everything together.
Using the right ingredients and tools ensures your printing inks work well and stay fresh longer.
Set Up a Clean, Sterile Workspace for DIY Ink Making
Once you’ve gathered your ingredients and tools, the next step is to set up a workspace that keeps your DIY ink making safe and clean. To keep your printer inks sterile, thoroughly sterilize all tools, bottles, and utensils by boiling them in water for at least five minutes.
Choose a clean, dust-free area with easy access to sinks and cleaning supplies. Cover surfaces with disposable or washable coverings to protect against ink spills and make cleanup easier.
Work in a well-ventilated space to avoid inhaling fumes from solvents or chemicals. Keep hand soap, disinfectant, and paper towels nearby to quickly sanitize your hands and clean spills.
A sterile, organized workspace helps produce high-quality, safe homemade printer inks.
Mix and Simmer Ingredients to Create Vibrant Ink
To create vibrant ink, you’ll need to carefully mix your chosen pigments or dyes with water or alcohol, making sure to measure precisely for the right concentration.
Gently simmer the mixture while stirring constantly. This helps dissolve the colorants and makes the ink more vibrant.
Once the color reaches your desired hue, strain the mixture to remove any particles. That way, you’ll get a clear, smooth ink.
Selecting Fresh Ingredients
How do you guarantee your ink will be vibrant and durable? It all starts with selecting fresh, high-quality ingredients. Use fresh pigments or dyes to ensure bright, long-lasting colors. Old or degraded ingredients can dull your ink and reduce its lifespan.
Thoroughly mix your ingredients to create an even suspension, which helps prevent clumping during simmering. This step guarantees consistent color throughout your ink. When simmering, do so gently to extract the maximum color without burning or degrading the pigments.
Gradually add solvents like alcohol or water to reach the right consistency and flow. Finally, strain the mixture through a fine filter or cheesecloth to remove solid particles. This process ensures your ink is smooth, vibrant, and ready for use, giving you professional-quality results.
Proper Simmering Technique
Gently simmering your mixture is key to bringing out vibrant colors without damaging the ingredients. Keep the heat low and avoid boiling, which can break down delicate pigments.
Stir the mixture often to promote even heating and prevent sticking or burning at the bottom. This process usually takes 15-30 minutes, depending on how deep and rich you want the color and consistency to be.
The longer you simmer, the darker and more intense the ink becomes. As it simmers, flavors meld and colors get richer. Keep an eye on it to avoid overcooking.
Once you reach the color and concentration you like, you’re ready for the next step. Proper simmering ensures a smooth, colorful base for your homemade ink.
Straining for Clarity
After simmering your mixture, the next step is to strain it to get a clear, vibrant ink. Proper straining removes solid bits that could cloud the ink’s clarity.
Use a fine cheesecloth, coffee filter, or multiple layers of cheesecloth to catch smaller particles. This helps make the ink smoother and more transparent.
Let the mixture cool slightly before pouring it through the strainer. This prevents burns and spills. Gentle pressure pushes the liquid through, trapping debris.
The goal is to improve the ink’s flow and consistency so it prints well without clogging or uneven coloring. Once strained, store your ink in sterilized bottles.
This keeps it clear and helps prevent mold or bacteria from growing.
Filter and Adjust Your Homemade Ink for Perfect Consistency
Once your ink is mixed, strain it through a fine mesh or coffee filter to catch any solids and make sure it flows smoothly.
Next, adjust the viscosity by adding small amounts of water or binder, stirring well and testing the flow on paper.
Finally, store the filtered, adjusted ink in a clean, airtight container to keep it fresh and consistent.
Straining Techniques and Tools
Have you ever wondered how to guarantee your homemade ink has a smooth, even consistency? Filtering is key. Use a fine-mesh filter or cheesecloth to strain the ink, removing large particles that could clog your printer.
For finer sediments or natural pigments, use a gentle filter like a coffee filter. This helps clarify the ink without stripping away too much color. When filtering, pour slowly into a clean container to prevent splashing and make sure all impurities are removed thoroughly.
If the ink still looks cloudy or has particles, just repeat the filtering process. To get the right flow, you can add small amounts of distilled water after filtering, testing on paper to see if the consistency is right.
Proper straining ensures your homemade ink flows smoothly and produces sharp, vibrant prints.
Adjusting Ink Consistency
Are you struggling to get the perfect flow from your homemade ink? To adjust its viscosity, start by adding small amounts of water or alcohol until the ink flows smoothly.
If it’s too thick, thin it carefully, but avoid overdoing it—small adjustments work best. Heating or cooling the ink slightly can help, but do so cautiously to prevent changing the ink’s chemical properties.
Use a viscometer or observe how the ink flows on a test surface to gauge its consistency. If needed, strain the ink multiple times or use a centrifuge to remove remaining uneven particles, ensuring a uniform texture.
Achieving the right viscosity guarantees your ink flows evenly and prevents clogs, resulting in clear, consistent prints.
Preservation and Storage Methods
To keep your homemade ink fresh and working well over time, proper preservation and storage are key. Use sterilized, airtight glass bottles to prevent contamination and help it last longer.
Label each container with ingredients, the date you made it, and what you’ll use it for. This will help you stay organized and keep track of its freshness.
Store your ink in a cool, dark place because light and heat can cause it to degrade and fade in color.
Filtering your homemade ink through a fine mesh or coffee filter removes solids, making sure it flows smoothly and doesn’t clog.
Adjust the ink’s viscosity with water or a binder like gum arabic to keep the flow just right for your printer or pen.
With proper storage and preservation, your homemade ink will stay ready whenever you need it and maintain its quality over time.
Add Stabilizers and Additives to Improve Ink Performance
Enhancing your homemade ink’s performance often depends on adding the right stabilizers and additives. These improve the ink’s consistency, stability, and overall quality.
Stabilizers like surfactants or dispersants help keep pigments evenly suspended, preventing clumping or settling over time. Additives such as gum arabic boost flow, adhesion, and reduce feathering on paper, ensuring sharp prints.
Surfactants and dispersants keep pigments evenly suspended, preventing clumping and settling for consistent, high-quality prints.
Preservatives like thyme oil or cloves help prevent mold growth during storage. Thickeners, including xanthan gum or cornstarch, increase viscosity, reducing bleeding and improving control during printing.
Properly incorporating these stabilizers and additives can greatly improve your ink’s performance. This makes your DIY printing experience more reliable and professional-looking.
Test and Troubleshoot Your DIY Printer Ink in Your Printer
Before loading your homemade ink into your printer, it’s really important to test it thoroughly to make sure it works well. Use a test sheet of paper to check for color accuracy, drying time, and any feathering or bleeding issues.
Also, check the ink’s viscosity to see if it flows smoothly through the cartridges or nozzles without clogging. Do a small test print to see how well the ink sticks and if it smudges when drying.
Troubleshoot by adjusting the water content or adding stabilizers like gum arabic if the ink is too thick or thin. Run multiple tests to spot issues like inconsistent color, blockages, or poor print quality, and fix them before printing on a larger scale.
| Test Aspect | Troubleshoot Solution |
|---|---|
| Color accuracy | Adjust ink formulation |
| Drying time | Modify ink viscosity |
| Nozzle flow | Add stabilizers or water |
| Print quality | Fine-tune ink consistency |
Store, Label, and Maintain Your Homemade Ink for Long-Term Use
Proper storage, labeling, and maintenance are key to keeping your homemade ink fresh and usable over time. Store it in sterilized, airtight glass bottles or jars to prevent contamination.
Make sure each container is clearly labeled with the ingredients, date of preparation, and intended use. This helps you avoid confusion later on.
Keep your stored ink in a cool, dark place to prevent fading and chemical breakdown. Regularly check for signs of mold, sediment, or color change.
Filter or replace the ink as needed to maintain quality. After each use, thoroughly clean your storage containers to prevent residual buildup that could affect the ink’s longevity.
Frequently Asked Questions
How Do You Make Printer Ink?
To make your own printer ink, start by choosing a pigment or dye, like soot, berries, or plant extracts.
Mix it with a suitable solvent such as distilled water or alcohol until you get a smooth consistency.
Add stabilizers like gum arabic to improve flow and adhesion.
Filter the mixture to remove solids, then test it in your printer carefully, knowing homemade ink might clog or damage your device.
What Ink Cartridge for Canon TS3700?
For your Canon TS3700, you’ll need the PG-240 black ink cartridge and the CL-241 color ink cartridge. These are standard cartridges designed specifically for your printer.
Make sure to use genuine Canon cartridges for the best print quality and to avoid damage. To replace them, open the top cover, remove the empty cartridge, and snap in the new one until it clicks.
This keeps your printer running smoothly.
How to Make Homemade Ink Easy?
To make homemade ink easily, start by mixing soot, water, alcohol, glycerin, and fragrance oils thoroughly. Let the mixture sit for an hour, then strain it through a coffee filter to remove solids.
Adjust the color and thickness by adding more pigment, water, or gum arabic. Store your ink in sterilized bottles, label them, and test on paper before regular use.
This simple process creates smooth, usable ink for writing or printing.
What Are the Three Main Ingredients of Ink?
Think of ink as a lively recipe, where the main ingredients are your color, glue, and liquid.
The pigments or dyes are like your paintbrushes, adding vibrant hue and opacity.
Binders act like glue, helping the ink stick to surfaces.
Solvents are the liquid base, controlling thickness and drying speed.
Together, these three ingredients create the perfect blend, transforming your ideas into colorful, lasting prints.
Conclusion
Now, imagine your workspace bathed in a soft glow, where vibrant ink flows from your homemade bottle like a secret potion.
With each careful step, you’ve crafted a rich, shimmering hue ready to bring your projects to life.
As you store your creation, think of it as a treasure chest of endless creativity.
With patience and care, your DIY ink will serve as your trusty partner, turning blank pages into vivid stories and breathtaking images.
And remember, making your own printer ink is a simple process that unlocks unlimited possibilities for your creative projects.