How Do You Effectively Remove Ink From Paper?
Dealing with ink marks on paper can be really frustrating, especially when you want to keep your documents or artwork pristine. Many people struggle with removing ink without damaging the paper, and it’s a common concern for students, artists, and office workers alike.
To effectively remove ink from paper, first identify the ink type, as some are easier to lift than others. Use gentle methods like dabbling with rubbing alcohol or acetone on a cotton swab, testing on hidden areas first.
For surface ink, an eraser or soft scraping might work. You can also try home remedies like lemon juice or baking soda.
For stubborn stains, covering or concealing the ink might be best. Keep in mind, some inks are permanent, so technique and caution are key—learn more to get the best results.
Key Takeaways
- Test removal methods on small, hidden areas first. This way, you can see how the paper reacts and whether the method is effective before trying it on the visible parts.
- Use gentle mechanical tools like erasers or craft blades carefully. Be cautious to lift the ink without tearing the paper.
- When using chemical solvents like rubbing alcohol or acetone, apply them sparingly with cotton swabs. Avoid rubbing too much, as this can damage the paper.
- Support fragile paper with a backing and work slowly. Taking your time helps prevent tearing or warping during the removal process.
- If the ink is persistent or permanent, it’s best to seek professional conservation services. They have the experience and tools to avoid causing irreversible damage.
Understanding Different Types of Ink and How They Penetrate Paper
Understanding the different types of ink and how they penetrate paper is key to choosing the right removal method. Ink types vary in their chemical makeup and how they interact with paper fibers.
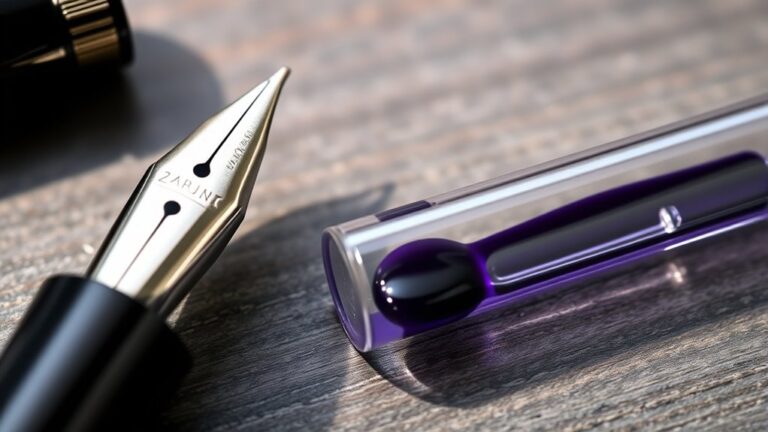
For example, ballpoint ink is oil-based and tends to stay on the surface, so it’s usually easier to remove or cover. Fountain pen ink contains water and dyes that often soak deeply into the paper fibers, making it more challenging to remove.
Gel ink, suspended in a gel medium, adheres strongly and resists erasing efforts. Permanent ink like India ink bonds tightly with paper fibers and is waterproof, making it highly resistant to removal.
Knowing how each ink type penetrates paper helps you decide the best approach, whether you’re dealing with surface stains or deeply embedded marks.
Preparing Your Workspace and Choosing the Right Tools for Ink Removal
Start by setting up a clean, well-ventilated workspace free of clutter to handle chemicals safely.
Gather essential tools like erasers, cotton swabs, and small brushes so you’re ready for different removal methods.
Protect your surface with a scrap piece of paper or plastic to prevent damage during the process.
Workspace Setup Essentials
Setting up your workspace properly is key for a smooth and safe ink removal process. Start with a clean, well-lit area that has a flat surface to prevent spills and keep everything stable.
Before you begin, gather all your tools—erasers, correction pens, solvents, and protective gloves—so you won’t have to stop halfway searching for supplies.
Place a cutting mat or scrap paper underneath to protect your work surface from damage or stains.
If you’re using chemical solvents like acetone or alcohol, make sure the area is well-ventilated to avoid inhaling fumes.
Keep a small container of water, a soft cloth, and paper towels nearby for quick cleanup and to manage excess liquids.
A well-prepared workspace helps you work efficiently and safely, reducing the risk of accidents or damage during ink removal.
Selecting Appropriate Removal Tools
Choosing the right tools is essential for effectively removing ink without damaging your paper. Start with soft tools like a gentle eraser, small cotton swabs, or correction pens to minimize harm.
Use a clean cloth or blotting paper to absorb excess ink or solvents, gently rubbing to avoid tearing or smudging the paper. For surface ink, fine-grit sandpaper or craft blades can be used carefully on thicker or high-quality paper.
When working with solvents like isopropyl alcohol or acetone, always test them on small, hidden areas first. This helps prevent discoloration or warping of your paper.
Keep protective materials nearby, such as tissues and damp cloths, to quickly manage any excess ink or solvent. Proper tool selection is key to a successful ink removal process.
Test Ink Removal Safely on Small Areas First
Before applying any ink removal method to your paper, it’s important to test it on a small, hidden area first. This helps you make sure the process is safe and won’t damage the whole document.
Always test ink removal on a small hidden spot first to prevent damage to the entire document.
Use a tiny amount of solvent, like rubbing alcohol or acetone, and gently dab it onto the small area with a cotton swab. Avoid rubbing, since that can cause tearing or warping.
Let the area dry completely and check for any reactions, like discoloration or damage. If the paper stays intact and the ink lightens or disappears, it’s a good sign the method is safe.
Be sure to document your results to see if this approach works for your paper and ink before moving on to larger sections.
How to Safely Use Rubbing Alcohol and Acetone to Remove Ink
To safely use rubbing alcohol or acetone for ink removal, start by dampening a cotton swab with a small amount of the solvent. Gently dab the inked area to dissolve the ink without oversaturating the paper.
Always test the solvent on a small, inconspicuous spot first to prevent discoloration or warping. Use a light, blotting motion rather than rubbing, which can tear or damage the paper fibers.
Once the ink starts to dissolve, blot immediately with a clean tissue or cloth to remove excess solvent and ink residue. Allow the paper to dry completely flat before handling or writing over it.
Proper application of rubbing alcohol or acetone guarantees effective ink removal while preserving the paper’s integrity.
Gentle Home Remedies: Lemon Juice and Baking Soda for Ink Lift
Gentle home remedies like lemon juice and baking soda can be effective for lifting ink from paper without causing much damage. Lemon juice’s natural acidity helps break down ink pigments when dabbed carefully with a cotton swab, so avoid rubbing too hard to prevent tearing the paper.
Baking soda, mixed with water to create a mild abrasive paste, can loosen ink fibers when applied in circular motions. After that, dab the area with a damp cloth to remove any leftover ink. These natural methods work best on plain, white paper and should be tested on a small spot first to avoid discoloration.
Use the table below to see how these remedies interact with paper stains:
| Remedy | Application Method | Effect |
|---|---|---|
| Lemon Juice | Dab gently with Q-tip | Breaks down ink pigments |
| Baking Soda | Circular paste application | Loosens ink fibers |
| Dabbing | Blot with a damp cloth | Removes residual ink |
| Testing | Small area first | Prevents discoloration |
| Caution | Avoid excessive rubbing | Protects paper integrity |
Mechanical Ink Removal: Scraping and Erasing Without Damaging Paper
When removing ink mechanically, use gentle scraping with a sharp craft blade or X-Acto knife at a shallow angle to avoid tearing the paper.
Choose a high-quality rubber latex sand eraser and work in circular motions, supporting the paper with a backing sheet to prevent damage.
Always test your technique on a small area first to verify the paper’s stability before proceeding.
Gentle Scraping Techniques
Using a sharp X-Acto knife at a shallow angle lets you carefully lift surface ink without damaging the paper. Apply gentle scraping with light, even pressure, and support the paper with a backing sheet or firm surface to prevent flexing.
Test your scraping technique on a small, hidden area first. This helps you see how the paper reacts and if the surface ink can be removed effectively without harm.
For surface-level removal, use fine-grit sandpaper or a sanding block with gentle, circular motions. This minimizes abrasion and keeps the paper intact.
After scraping, gently burnish or smooth the area with a soft eraser or spoon. This restores the paper’s surface and reduces roughness caused by scraping.
This approach helps prevent damage while effectively removing unwanted ink, keeping your paper in good shape.
Proper Eraser Selection
Choosing the right eraser is key for removing ink without damaging the paper. Use a quality rubber like latex or art gum, designed for delicate surfaces. These erasers help minimize paper damage and lift ink effectively.
When erasing, press lightly and move in small circular motions. This gently lifts the ink without tearing the fibers. Supporting the paper with a firm backing sheet can also help prevent stretching or tearing.
Always test the eraser on a small, hidden spot first to make sure it won’t cause any damage. For more stubborn ink on the surface, you might carefully scrape with a craft knife or fine-grit sandpaper — but for most cases, erasing is best.
Using the right eraser and technique is essential for removing ink successfully without harming the paper’s integrity.
Supporting Paper Stability
Ever wondered how to keep your paper intact while removing ink mechanically? To support stability during mechanical removal, use a support backing sheet behind fragile paper to prevent tearing or warping. This gives a firm surface, reducing the risk of creasing.
When scraping or erasing, apply light pressure with your abrasive material—like fine sandpaper or a craft blade—to avoid damaging the paper surface. Hold the blade at a shallow angle to minimize gouging and preserve fibers.
Regularly lift the paper to check your progress, making sure you’re not removing too much or causing unintended damage. For very fragile or thin paper, place it on a stiff, flat surface to support stability.
This makes mechanical removal safer and more effective without risking tears or distortion.
Covering Ink With Correction Fluids, Tapes, and Creative Overlays
When you need to hide ink mistakes quickly and neatly, correction fluids, tapes, and creative overlays are your best options. Correction fluids like white-out give a smooth, even cover when applied thinly and allowed to dry.
Correction tapes offer an instant, mess-free fix by laying down an opaque strip directly over the error. For a more decorative touch, you can use stickers or washi tape to hide ink spots creatively, turning mistakes into part of your design.
Applying acrylic paint or white gouache can also provide durable coverage on high-quality paper. Creative overlays like doodles, borders, or text boxes can divert attention from errors, transforming correction into an artistic element.
These methods help you fix ink mistakes effectively while adding a personal touch.
Tips for Effective Ink Removal and Common Mistakes to Avoid
To improve your chances of successfully removing ink, it’s important to follow some key tips and avoid common mistakes. Start by gently testing your eraser techniques or correction methods on small, hidden areas to prevent damaging the paper.
Avoid aggressive rubbing or scraping, as it can tear or warp delicate surfaces. Use the right type of eraser or correction tool suited for both the ink and paper to minimize residual traces.
Always perform a patch test with solvents like alcohol or acetone first to check for any discoloration or warping. Rushing or applying too much force can cause permanent damage and lower your chances of successful ink removal.
When to Seek Professional Help or Accept That Ink May Be Irreversible
While careful techniques can often improve ink removal, there are times when professional help becomes necessary. If ink stains are old, deeply absorbed, or seem permanent, trying aggressive removal might do more harm than good.
Sometimes, professional help is essential for removing stubborn or old ink stains safely.
In such cases, expert restoration and conservation methods are essential for preserving the document. Professionals can use advanced chemical treatments or laser removal techniques that aren’t suitable for home use.
These methods help reduce the risk of weakening or tearing the paper. Recognizing when ink is likely irreversible can prevent unnecessary damage and guide you toward preservation or creative concealment instead of futile attempts at removal.
When in doubt, consulting a professional is the best way to avoid damage and ensure your document’s integrity is maintained.
How to Protect Your Documents and Prevent Ink Stains in the Future
Protecting your documents from ink stains starts with simple, proactive measures that can save you time and effort later. Store your documents in a cool, dry place to prevent ink smudging or bleeding caused by humidity.
Use archival-quality paper and fast-drying inks to reduce the risk of stains and make future corrections easier. Applying protective laminates or clear overlays helps prevent ink transfer and shields documents from spills or smudges.
Keep pens capped when you’re not using them, and handle documents with clean, dry hands to avoid smudging. For important files, consider digital copies to get rid of ink stains altogether.
Frequently Asked Questions
How Do You Remove Ink From Paper Without Damaging the Paper?
To remove ink without damaging the paper, start by gently testing a small hidden area with a soft eraser or correction tape.
If needed, use a cotton swab dipped lightly in a mild solvent like rubbing alcohol, blotting carefully to avoid oversaturation.
Support the paper with a backing sheet, and work slowly to prevent tears or warping.
Always proceed gently and test first to protect your paper’s integrity.
Does Dawn Soap Remove Ink?
Imagine you’re trying to clean a freshly inked letter with Dawn soap. You might think it helps, but it doesn’t. Dawn isn’t designed to remove ink; it’s mainly for grease and oils.
Instead, you should use rubbing alcohol or acetone. Applying Dawn could smudge the ink or damage the paper, making things worse.
What Destroys Ink on Paper?
You can destroy ink on paper using harsh chemicals like bleach or strong solvents. These can break down the ink pigments but might also damage the paper itself.
Mechanical methods such as scraping or sanding can remove ink, but they come with risks. You might tear or ruin the paper in the process.
Be aware that these methods often cause discoloration, warping, or damage to the paper fibers. This makes the process risky and sometimes impossible to undo.
How Do Professionals Remove Ink?
Professionals carefully remove ink by using specialized solvents like acetone or alcohol-based solutions. These dissolve the ink without harming the paper.
They also use fine tools such as blades or gritty erasers to gently lift or scrape the ink away. For stubborn stains, they might apply controlled heat or laser treatments.
Testing on hidden areas ensures the paper’s integrity. This helps prevent accidental damage while still getting the best removal results.
Conclusion
Remember, removing ink takes patience and the right approach. Don’t rush or use harsh chemicals that could damage your paper. Start with gentle methods and test first to avoid any surprises.
If the stain persists or your document is valuable, consider professional help instead of risking further harm. It’s better to be safe than sorry when dealing with delicate papers.
By staying careful and informed, you can effectively remove ink from paper and keep your documents looking their best. Proper technique now can prevent future stains and keep your papers clean and legible for years to come.