10 Simple Steps to Do You Refill Your Ink Stamp
Many people struggle with keeping their ink stamps working smoothly, especially when the impressions start to fade or become uneven. If you’re tired of guessing when to refill or replace the pad, you’re not alone.
Luckily, refilling your ink stamp is simpler than you might think.
To refill your ink stamp, first check if the impressions are faded or uneven, indicating low ink. Secure the stamp in the closed position and gently pull out the ink pad.
Apply 3-4 drops of compatible ink evenly across the pad, then reinsert and press firmly to distribute the ink.
Test your stamp for clear impressions. If needed, replace the pad with a new one and make sure proper fit.
Continue to follow each step closely to keep your stamp working perfectly.
Key Takeaways
- Check if the stamp image looks faint or uneven. If it does, that’s a sign you need to re-ink it.
- Flip the stamp over and lock it in the closed position. Then, carefully remove the ink pad.
- Apply 3 to 4 drops of ink directly onto the surface of the pad. Spread the ink evenly across the entire pad.
- Re-insert the pad into the stamp. Press down firmly to ensure it stays in place.
- Test the stamp on a piece of paper. Make sure the impressions are clear and even.
- If the pad looks worn out or doesn’t produce good impressions anymore, replace it.
- Before using a new pad, double-check that it fits well and aligns properly with the stamp.
How Do I Know When My Stamp Needs Re-Inking?
Knowing when your stamp needs re-inking is key to getting clear, professional impressions. If your stamped image looks faded or lacks sharpness, it’s a sign you need to refill the ink pad.
Inconsistent ink coverage or uneven impressions also point to low ink levels. If you find yourself re-stamping repeatedly without better results, the ink pad might have dried out or is nearly dry.
A noticeable decrease in ink transfer during stamping confirms it’s time for re-inking. To be sure, check the ink pad visually for dryness or ink depletion.
When the ink pad looks dry or faint, it’s a clear sign that re-inking will restore clarity and keep your impressions crisp and professional.
Preparing Your Stamp for Re-Inking
Before you start re-inking, it’s important to prepare your stamp properly. First, flip the stamp over and secure it in the closed position to prevent accidental movement. This ensures safety and helps you work more precisely during the process.
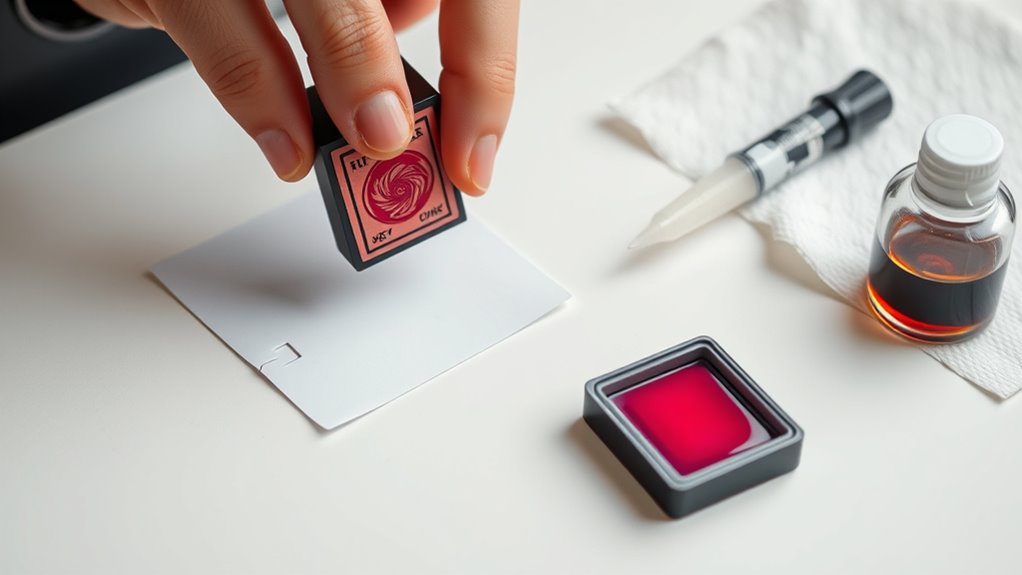
Next, gently pull out the stamp pad using the side tabs to access the ink surface. Be careful not to damage the pad or spill ink. Once the pad is removed, apply 3 to 4 drops of ink evenly across the entire surface to ensure thorough re-inking.
After applying the ink, give it a few seconds to sit until no pooling or excess ink is visible. Finally, re-insert the pad into the stamp body and press down to secure it in place.
Step-by-Step: How to Refill Your Stamp Pad
To refill your stamp pad, start by locking the stamp to keep it stable. Then gently pull out the pad using the side tabs. This is the proper way to access the stamp pad for re-ink.
Once removed, dispense 3 to 4 drops of ink evenly across the surface of the pad. Be careful not to over-ink, as excess ink can cause pooling. Give the ink a few seconds to soak in, ensuring even distribution.
Afterward, re-insert the inked pad into the stamp, pressing down firmly to lock it securely. This guarantees the re-ink process is complete and the pad is properly seated.
Finally, test your stamp to verify the ink is evenly distributed and the image appears clear. This confirms you’ve successfully re-inked the stamp pad the proper way.
Replacing the Stamp Pad Entirely
When replacing the stamp pad entirely, make sure to pick the right replacement for your stamp model.
Carefully remove the old pad to avoid damaging the housing. Then, insert the new pad securely in place.
Double-check that the new pad is locked in properly. This will help your stamp produce clear, consistent impressions.
Choosing the Right Replacement
Are you sure you’re choosing the right replacement stamp pad for your specific model? Picking the correct pad is key to getting the best performance. First, identify your stamp model, like Trodat 4914, 4915, or 4924, to make sure it fits.
Next, double-check that the replacement is designed for your type—whether it’s pre-inked or self-inking—to avoid any issues. Also, verify that the ink matches your needs for consistent, even coverage.
Proper alignment during installation is important. It helps your stamp operate smoothly and prevents ink smudging. When shopping, choose a replacement pad that matches your stamp’s specs for easy insertion and a secure fit.
Following these steps will help you keep your stamps looking professional and clean every time.
Removing Old Pad Carefully
Before removing the old pad, make sure to gently lock the stamp so it doesn’t move during the process.
Carefully take out the pad by gripping the designated side tabs to avoid damaging the stamp housing.
Handle the pad by its edges to prevent ink spills or contamination.
Once it’s out, check inside the stamp for any leftover ink or debris that could affect the new pad’s performance.
Ensure the old pad is completely removed before inserting the new one.
Proper placement is key for the stamp to work correctly, so take your time.
Make sure all old material is cleared and the interior is clean before proceeding.
This careful removal helps your stamp operate smoothly with its new pad.
Installing New Pad Securely
To install the new pad securely, start by flipping the stamp over and locking it in place. This keeps it steady and makes replacing the pad easier.
Carefully remove the old pad by gently pulling on the side tabs to avoid damaging the stamp housing.
Next, take the cover off your new stamp pad and align it properly with the internal grooves of the stamp.
Insert the new pad into the stamp body, making sure it fits snugly and lines up with the locking mechanism.
Finally, depress the stamp to lock the new pad firmly in place.
Make sure it’s secure before you use it. This method is the best way to re-ink your Self-Inking Stamp, giving you consistent ink and a clean impression every time.
Choosing the Right Ink and Replacement Pads
Choosing the right ink and replacement pads is key to getting crisp, consistent impressions. When shopping online, look for ink made specifically for rubber stamps, like solvent-based or pigment-based inks, for better sticking power and durability.
Think about the size of your stamp and choose an ink bottle with the right volume, like 1 oz. or 2 oz., especially if you’ll be using it often. When replacing pads, always match the model number, such as Trodat 4914 or 4915, to ensure a perfect fit and top performance.
Before adding items to your cart, check the manufacturer’s specifications to make sure they’re compatible. Buying replacement pads from reputable suppliers helps guarantee quality and prevents issues like uneven ink distribution or damage to your stamp.
Tips for Even Ink Distribution and Stamp Performance
Ensuring even ink distribution is key for clear, professional stamps. It all starts with applying ink evenly across the entire surface of your stamp pad. This helps prevent uneven impressions and smudging.
Achieve clear, professional stamps by applying ink evenly across the entire pad surface.
Spread the ink drops evenly across the pad, making sure it’s fully covered. Use a spreading tool or the edge of a credit card to gently smooth out the ink, avoiding pooling or thin spots.
Let the ink sit for a few seconds after applying. This allows it to absorb better, which results in a more consistent transfer.
Regularly check the ink layer and re-ink as needed to keep the pad well-moistened. Avoid over-inking, as it can cause smudges and uneven prints.
Troubleshooting Common Ink and Stamping Issues
When your stamps produce faint impressions or inconsistent ink flow, it usually means your stamp pad needs re-inking or replacing. Dried or uneven ink inside the pad can cause unclear results. Proper maintenance helps keep your stamps working smoothly.
Re-inking the pad correctly is important. Applying too much or too little ink can lead to leakage or uneven stamping. Follow the manufacturer’s instructions for re-inking and pad replacement to avoid these issues.
Damage to internal mechanisms from mishandling can also reduce ink output or cause the stamp to fail altogether. Regular care and gentle handling help prevent these problems.
Common issues like faint impressions, inconsistent ink flow, ink leakage, stamp failure, or unclear stamping all have specific causes. Addressing these promptly can keep your stamps in top shape.
For example, faint impressions are often caused by a dried or depleted ink pad. Uneven ink distribution or damage can cause inconsistent ink flow. Over-application during re-inking might lead to ink leakage.
Worn or damaged pads can make your stamps produce unclear impressions. Damage to internal parts can cause stamp failure. Regular maintenance ensures you get consistent, high-quality impressions every time.
Frequently Asked Questions
How to Refill Ink on Simply Stamps?
To refill your Simply Stamps ink, lock the stamp in place and gently remove the ink pad using the side tabs.
Dispense 3 to 4 drops of ink evenly across the pad’s surface, then wait a few seconds for it to absorb.
Reinsert the pad into the stamp, press down to lock it securely, and test the stamp to make sure the ink is evenly distributed and stamps clearly.
How to Refill Your Self-Inking Stamp?
To refill your self-inking stamp, start by locking it open. Gently remove the ink pad using the side tabs.
Next, dispense 3 to 4 drops of ink evenly across the pad, making sure not to let the ink pool.
Let it sit for a few seconds to absorb. Then, reinsert the pad and press down to lock it back in place.
Finally, test the stamp on paper to check the ink coverage and clarity.
Can Pre-Inked Stamps Be Refilled?
Pre-inked stamps generally shouldn’t be refilled because doing so often damages their internal mechanism or causes ink leaks. While you might think refilling could save money, it usually leads to uneven ink distribution and poor stamp clarity.
Most manufacturers recommend replacing the stamp once the ink runs out, ensuring consistent quality. Attempting to refill can ultimately cost you more time and money, so it’s better to buy a new one.
How to Put Ink Inside of Stamp?
To put ink inside your stamp, gently remove the ink pad by pulling on the side tabs after locking the stamp in place.
Dispense 3 to 4 drops of ink evenly across the pad’s surface, making sure it covers fully without pooling.
Let the ink sit for a few seconds to absorb, then reinsert and lock the pad securely.
Finally, test on scrap paper to check the ink coverage and clarity.
Conclusion
Now that you know how to refill your ink stamp, you’ll keep your impressions crisp and clear. A well-maintained stamp can last up to five years, which is pretty impressive.
Regular re-inking ensures your stamp stays reliable, saving you time and frustration. Keep these simple steps in mind, and you’ll enjoy flawless stamping every time.
With just a little effort, your stamp can stay in top shape for years to come. Taking care of it by refilling properly makes all the difference.