7 Simple Steps to Refill Stamp Ink
Many people struggle with keeping their stamps inked properly, leading to faded or uneven impressions. If you’re tired of redoing stamps or dealing with messy inks, you’re not alone. Replacing or refilling stamp ink can seem tricky, but it doesn’t have to be.
To refill your stamp ink in seven simple steps, start by preparing your stamp and gathering the right supplies, like manufacturer-recommended ink and clean cloths.
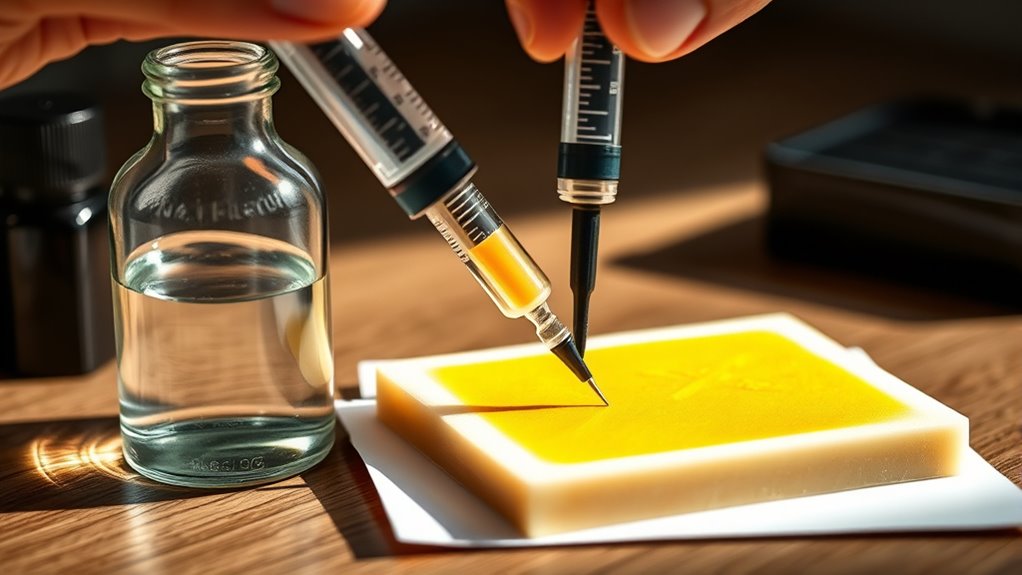
Carefully remove the ink pad or handle, then apply 3-4 drops of ink evenly onto the pad surface or into the refill opening.
Let the ink absorb for at least an hour before testing for clarity.
Keep everything clean and store your stamp properly to ensure long-lasting, sharp impressions—continue to investigate for detailed tips.
Key Takeaways
- First, identify the correct ink type for your stamp and gather all the supplies you’ll need before you begin. It’s always best to be prepared so you don’t have to stop halfway through.
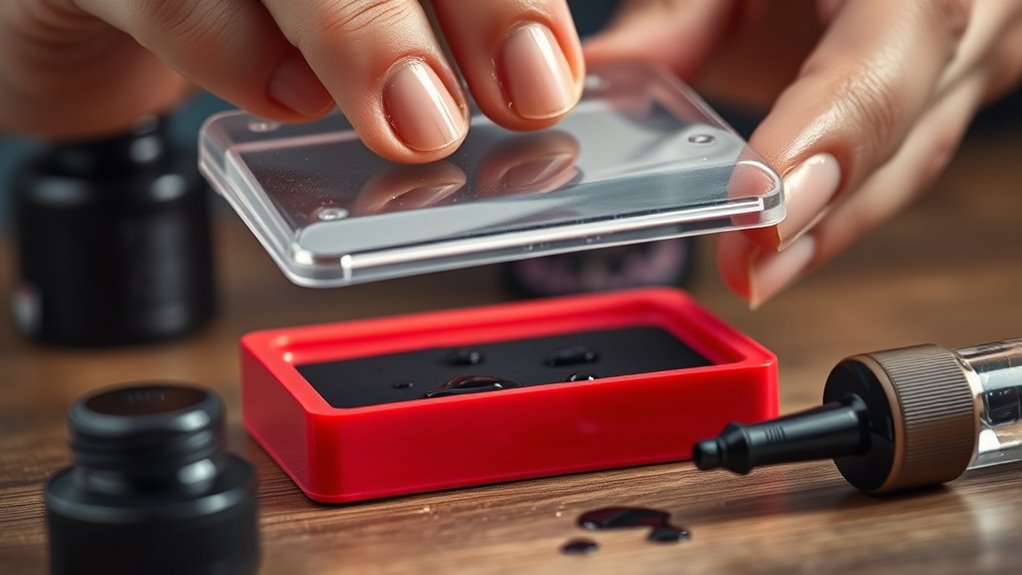
- Next, carefully remove the ink pad or handle to access the ink reservoir safely. Be gentle to avoid any spills or damage.
- Then, apply 3 to 4 drops of compatible ink evenly onto the pad surface or directly into the refill opening. Make sure you’re using the right ink to avoid any issues.
- Allow the ink to absorb for at least an hour before testing out the stamp. Patience here helps ensure a clean, crisp impression.
- Finally, reinsert the pad or handle, and do a test on scrap paper. Check that the impressions are clear and even before using it on your main project.
Why Your Stamp’s Impressions Fade and How to Re-Ink
If your stamp’s impressions are fading or becoming patchy, it’s usually because the ink on the pad has dried out or been used up. When the ink reservoir runs low, your impressions will look lighter or uneven.
To fix this, you need to re-ink your ink pad with the correct ink type. Proper re-inking restores the ink to the pad, which helps keep your impressions clear and consistent.
Re-ink your stamp with the right ink to keep impressions clear and consistent.
Regularly re-ink before impressions become too faint helps maintain stamp quality and extends its lifespan. Using too little or too much ink can cause issues, so be sure to apply the right amount.
When your impressions start to fade, don’t wait—re-ink promptly. This keeps your stamp working well and saves you time and effort in the long run.
How to Prepare Your Stamp and Gather Supplies
Before you start re-inking, you need to prepare your stamp and gather all necessary supplies. First, identify the type of stamp you have to ensure you pick the right ink and tools.
Lock the stamp in its open or upright position to prevent accidental movement during preparation. Gently remove the ink pad or handle, depending on your stamp model, to access the ink reservoir.
Collect the appropriate ink bottle that matches the manufacturer’s recommended ink type for your stamp. Prepare a clean, flat workspace with scrap paper or paper towels to catch any potential ink spills during refilling.
Having everything ready and organized makes the process smoother and helps avoid mistakes that could damage your stamp or mess your workspace.
Step-by-Step Guide to Re-Inking Self-Inking and Pre-Inked Stamps
To re-ink your self-inking or pre-inked stamp, start by carefully removing the ink pad. Apply 3-4 drops of compatible ink onto the pad.
Let the ink absorb for a few minutes. Then, reinsert the pad into the stamp and press firmly to ensure good contact.
Finally, test the stamp on scrap paper to check the impression quality before using it regularly.
Preparing the Stamp
Wondering how to prepare your stamp for re-inking? First, lock the stamp in the open position to access the ink reservoir safely. Carefully remove the ink pad using the side tabs or designated slot. This step makes it easier to apply the refill ink without making a mess.
Here are key steps to prepare your stamp:
- Gently lift out the stamp pad, avoiding damage.
- Apply 3-4 drops of compatible ink evenly across the surface of the removed pad.
- Wait a few minutes for the ink to fully absorb into the pad before reinserting.
Taking your time during this process ensures the ink is evenly distributed, resulting in vibrant, consistent impressions. Proper preparation makes the refill process smoother and keeps your stamp in top condition.
Applying the Ink
Are you ready to successfully re-ink your self-inking or pre-inked stamp? The proper way involves carefully applying ink to the right parts of your ink pads.
For self-inking stamps, remove the ink pad and evenly add 3-4 drops of compatible ink directly onto the pad surface. Make sure the ink is fully absorbed before reinserting it to prevent uneven impressions.
For pre-inked stamps, add a few drops of ink into the refill opening and let it settle for 10-15 minutes. Use only the recommended ink type specified by the manufacturer to avoid damage.
After applying the ink, wait at least an hour before testing your stamp. This gives the ink time to migrate through the ink pads or reservoir.
Testing the Impression
How can you be sure your stamp is properly re-inked and ready for use? You need to perform test impressions on a blank sheet of paper. Press firmly to see if the impression is clear and consistent.
After re-inking, let the ink settle and flow through the stamp’s mechanisms for 10-15 minutes before testing. This helps ensure even ink distribution and prevents dry ink from causing faint or uneven impressions.
Check for any irregularities or faint marks that suggest the ink hasn’t fully absorbed or spread. If needed, use multiple test stamps to confirm the impression quality.
Adjust the amount of ink or re-ink if the impressions are faint or inconsistent. This way, your stamp will perform perfectly in future use.
How to Apply Ink Evenly for Clear, Consistent Impressions
Making sure your stamp ink is applied evenly is key to getting crisp, clear impressions every time. Start by applying a few drops of ink evenly across the entire surface of the pad. This helps distribute the ink uniformly and prevents patchy or faint areas.
When you Re-Ink a Self-Inking stamp, use a gentle squeeze to dispense ink directly into each reservoir or cavity. Be careful not to over-apply. Spread the ink gently with a small tool or your fingertip to avoid pooling and ensure an even coating.
Wait a few minutes after applying ink so it can fully absorb into the pad. Remember, over-inking can cause smudging and uneven impressions, so just apply enough for consistent, clean results.
How to Refill and Maintain Different Types of Stamp Ink and Pads
Different types of stamp ink and pads need different refilling and maintenance methods to keep your stamps working well.
Different stamp types require specific refilling and maintenance for optimal performance.
For self-inking stamps, take out the ink reservoir, add a few drops of compatible ink, and let it soak in before putting everything back together.
Pre-inked stamps are refilled through a refill opening with oil-based ink. Be careful when adding the ink, and let it settle before using.
Traditional rubber stamps may need you to refill or replace the ink pad entirely.
To keep your stamps performing their best:
- Use the right ink for each type of stamp
- Don’t over-ink to avoid smudging or damage
- Check and refill before the impressions start to fade
Proper refilling and maintenance help you get clear impressions, extend your stamp’s life, and keep everything working smoothly.
Troubleshooting Common Re-Inking Problems and Fixes
When re-inking your stamp, issues like faint impressions or smudging are usually caused by common problems that are easy to fix.
If your impressions are faint, make sure the ink has fully soaked into the pad. Give it at least an hour to rest before testing again.
Uneven ink distribution or pooling can lead to smudges or inconsistent impressions. Reapply ink carefully to dry or uneven areas.
Be careful not to over-ink, as too much ink can leak or smudge around the edges. Check that you’re not overfilling during re-inking.
If your impressions are still poor, inspect the internal parts for damage or dried ink buildup. Consider replacing the ink pad if needed.
These simple steps should help you fix most re-inking problems quickly and easily.
Best Practices for Long-Lasting, Sharp Stamp Impressions
Choosing the right ink and keeping your stamp in good shape are essential for getting clear, long-lasting impressions.
Make sure to use the recommended ink type and spread it evenly to avoid smudges.
Cleaning your stamp regularly helps keep the surface in top condition.
Following these simple tips will help you get consistently sharp results every time.
Proper Ink Selection
Have you ever wondered how to guarantee your stamps produce clear, lasting impressions? Proper ink selection is key.
For self-inking stamps, water-based ink is your best choice because it assures smooth, consistent impressions and prevents damage to the internal mechanisms. Always use ink recommended by the stamp manufacturer to avoid ink compatibility issues that could harm your equipment.
For pre-inked stamps, opt for oil-based ink designed for deep, vibrant, and long-lasting impressions. Avoid mixing different ink brands or types, as incompatibility can lead to poor print quality and stamp damage.
Refill before impressions fade to maintain sharpness and extend your stamp’s lifespan.
- Use water-based ink for self-inking stamps
- Always follow manufacturer ink recommendations
- Avoid mixing incompatible ink types
Regular Maintenance Practices
To keep your stamps producing sharp, consistent impressions, regular maintenance is essential. Inspection helps identify fading or uneven impressions, signaling when re-inking is necessary.
Cleaning the stamp surface and handle periodically removes dust, ink residue, and debris, helping maintain clarity. Proper storage in a cool, dry place prevents ink from drying out or clogging the stamp.
Furthermore, avoid over-inking to prevent leaks and damage. After re-inking, give your stamp at least an hour to rest so the ink can absorb fully for clear impressions.
You can use this table as a quick reference:
| Maintenance Step | Purpose |
|---|---|
| Inspection | Detect fading or uneven impressions |
| Cleaning | Remove debris and ink residue |
| Correct Storage | Prevent ink drying and clogging |
| Proper Re-inking | Avoid leaks and damage |
| Rest After Re-inking | Ensure sharp, clear impressions |
Frequently Asked Questions
How to Refill Ink on Simply Stamps?
To refill ink on Simply Stamps, start by gently removing the ink pad using the side tabs.
Next, apply 3 to 4 drops of compatible ink evenly across the surface of the pad.
Give it a few seconds to let the ink absorb into the pad.
Once that’s done, reinsert the pad into the stamp and lock it back into place.
Finally, test your stamp on scrap paper to make sure it produces clear, consistent impressions every time.
How to Fill a Refillable Stamp?
To fill a refillable stamp, start by removing the handle or ink pad to access the ink reservoir.
Then, carefully drip 3-4 drops of compatible ink directly into the cavity.
Give it a few minutes for the ink to absorb and spread evenly.
Once that’s done, reassemble the stamp securely.
Finally, test it on scrap paper to make sure it produces clear, consistent impressions every time.
How to Put Ink Inside of Stamp?
You can put ink inside your stamp by removing the handle or ink pad. Then, add 3-4 drops of ink directly into the reservoir or onto the pad.
Don’t worry about overfilling. Just spread the ink evenly and wait a few minutes for it to absorb.
Reassemble the stamp, press lightly, and test on scrap paper. This quick step keeps your stamp vibrant and ready to use without mess.
How to Fill a Stamp Dispenser?
To fill a stamp dispenser, start by removing the handle to access the ink chamber.
Carefully add 3-4 drops of compatible ink into the reservoir.
Gently press or tilt the stamp to evenly distribute the ink inside.
Let it sit for a few minutes so the ink can absorb fully.
Once it’s ready, reattach the handle securely and test on scrap paper to check the impressions.
Conclusion
Refilling your stamp ink is quick and easy once you know the steps. Don’t worry if your impressions fade—they’re simple to restore with a few careful re-inking techniques. Even if you’re worried about uneven ink or mess, following these tips guarantees sharp, lasting impressions every time.
With a little practice, you’ll keep your stamps looking professional without the hassle or expense of replacing them. Stick with these steps, and you’ll get perfect results every time. Refilling your stamp ink is the best way to maintain clear, vibrant impressions without the need for new stamps.