Step-by-Step Guide to Put Ink in Your HP Printer
Many people struggle with replacing ink in their HP printers, especially when it feels tricky or confusing. You’re not alone—getting those cartridges just right can be frustrating. But once you know the right steps, it’s a lot easier to keep your printer running smoothly and avoid costly mishaps.
To replace ink in your HP printer, start by turning it on and opening the access panel where the cartridges are located, usually at the front or top. Carefully remove the old cartridges, avoiding contact with contacts or nozzles, and install new ones, making sure they click into place.
Close the panel securely and run calibration or alignment if prompted for the best print quality. If issues arise, troubleshooting tips can help guarantee your printer recognizes the new cartridges—keep going for more detailed guidance.
Key Takeaways
- Turn on the printer and carefully open the access panel or cartridge door.
- Gently press or lift the latches to remove the old cartridges.
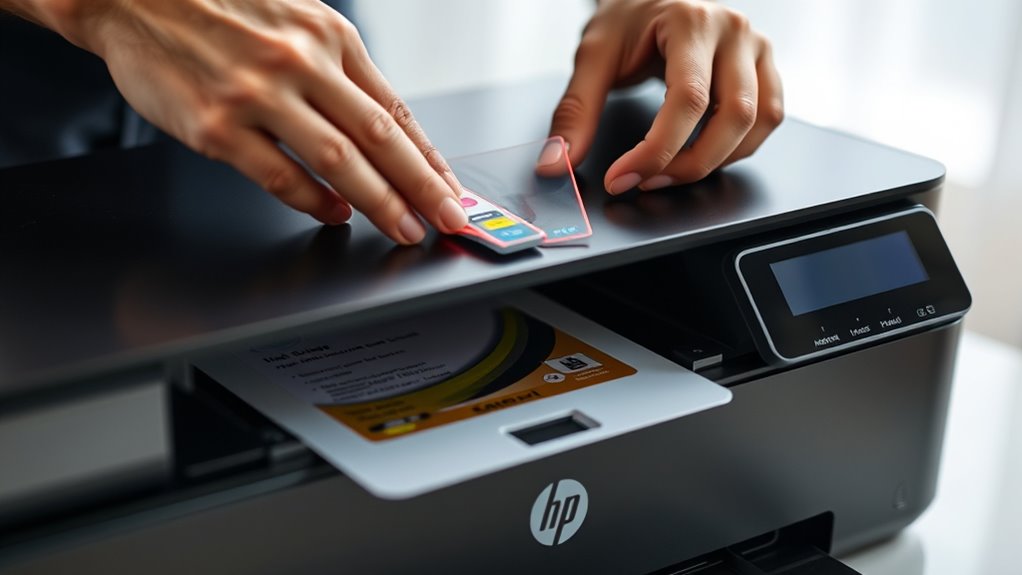
- Take out the protective tapes from your new cartridges, but be careful not to touch the contacts or nozzles.
- Insert the new cartridges into the correct color-coded slots. Push them in until you hear a click, indicating they’re secure.
- Close the access panel firmly.
- To make sure everything is set up correctly, run a print alignment or test page.
Prepare Your HP Printer for Ink Replacement
Before replacing the ink, make sure your HP printer is turned on and accessible. Open the access door or cover at the top of the printer to reach the ink cartridges.
Gently lift or press the cartridge access door or lid, depending on your HP model. Confirm the carriage moves to the ink replacement position; if it doesn’t, try to manually move it.
Before removing the old cartridges, check that you have new ink cartridges ready, with any protective tapes or packaging removed. Keep a clean, flat surface nearby to place used or new cartridges during the process.
Ensure new cartridges are ready and protected, with a clean surface nearby for a smooth replacement process.
This preparation helps you work efficiently and prevents messes or damage to your printer during ink replacement.
Identify the Correct HP Ink Cartridges for Your Printer
To make sure you pick the right ink cartridges for your HP printer, start by finding your printer’s model number. You can usually find it on the front, back, or bottom of the device.
Once you have the model number, check your printer manual or visit HP’s official website for a list of compatible ink cartridges for that specific model.
Look for HP cartridges that match your printer model to ensure ink compatibility. It’s a good idea to inspect your current cartridges for part numbers like HP 63, HP 65, or HP 64 to confirm the correct replacement type.
Also, double-check that the cartridge’s color or black-and-white designation matches what your printer needs.
For the best results, buy genuine ink cartridges from trusted sources or authorized HP retailers. This helps avoid damage and ensures high print quality.
Open the Cartridge Access Panel Safely
Make sure your printer is turned on so the cartridge carriage is in the right position.
Then, locate the access panel, usually marked with ink icons.
Use gentle lifting or flipping motions, focusing on the designated handles or latches, to open the panel carefully.
Always confirm the printer is powered off and the carriage is stationary before proceeding.
Locate Access Panel Properly
Most HP printers have a designated access panel or door that gives you entry to the ink cartridges, usually located at the front or top of the device. To begin, open the printer and locate this access panel.
Make sure the printer is turned on and wait for the carriage to move to the cartridge replacement position, signaling it’s ready. Some models have latches or clips that need releasing before you can open the panel; handle these carefully to avoid damage.
Always open the access panel on a flat, stable surface, and don’t force it if it resists. Properly locating the access panel guarantees smooth cartridge replacement and prevents unnecessary damage to the printer’s internal components.
Use Gentle Lifting Technique
When opening the access panel, lift it gently with both hands to avoid sudden drops or damage. Use steady pressure to open the panel smoothly, applying a gentle lifting technique.
Avoid forceful or jerky movements that could misalign or crack the plastic parts. Hold the panel at the designated grip points or edges, making sure not to press on sensitive internal components.
Always follow the manufacturer’s instructions about whether the printer should be powered on or off before opening the panel. Opening slowly and smoothly helps protect the printer’s delicate parts.
This careful approach ensures safe access for ink replacement and helps keep your printer in good condition. Remember, gentle handling is key to avoiding unnecessary repairs.
Ensure Power Is Off
Before opening the cartridge access panel, make sure your printer is completely turned off and unplugged from the power outlet. This helps prevent electrical shock and damage.
Use the printer’s power button to turn it off, and check that the power indicator light is off. Wait for the printer to cool down and make sure all internal parts are stationary.
Locate the access panel, usually at the top or front of the printer, and gently lift or open it. Don’t force it, as this could break clips or hinges.
Remove Old Ink Cartridges Carefully
Before removing the old cartridges, make sure your printer is turned off and opened carefully.
Gently press or lift the cartridges to release them, being careful not to touch the copper contacts or nozzles.
Carefully pull the cartridges straight out to avoid damage or ink spills.
Power Off Printer Properly
To safely remove old ink cartridges, first turn off your HP printer and unplug it from the power source. This keeps everything safe and helps prevent electrical issues or ink leaks.
Before opening the access door, make sure the printer is completely powered off and unplugged. This step reduces risks and protects your device.
Remember to confirm the printer is fully turned off before opening any covers. Unplug the power cord to eliminate electrical hazards.
It’s also a good idea to wait a few moments after powering off. This allows internal components to stabilize before you start working on the printer.
Access Cartridge Compartment Carefully
Open the printer’s access door or top cover carefully, making sure it’s fully lifted to expose the cartridge compartment. Once open, you’ll see the carriage that holds the ink cartridges, usually moving to the center when the printer is powered on.
To remove the old cartridge, gently press down or lift the cartridge latch, if present, to release it without force. Carefully grasp the cartridge by its sides, avoiding contact with the copper contacts and nozzles to prevent damage.
Remove the old ink cartridge slowly and steadily, making sure you don’t damage nearby parts or spill ink inside the compartment. Taking your time during this step helps prevent damage and ensures a smooth process when installing the new ink.
Release Cartridges Gently
Gently pressing down on the old ink cartridge helps release it from the carriage without causing damage. Use a light touch to avoid applying too much force, which could harm the cartridge or printer.
Once pressed, carefully handle the cartridge by its sides, keeping clear of copper contacts or nozzles to prevent contamination. To release the cartridge, pull it straight out, avoiding tilting or twisting that could cause ink leaks or contact damage.
If the cartridge feels stuck, gently wiggle it while pulling to loosen it without using too much force. Handling with care ensures the cartridge releases smoothly and reduces the risk of damaging delicate parts.
Handle the cartridge by its sides, not the nozzles or contacts. Use steady, gentle pressure when releasing the cartridge.
Avoid tilting or twisting it to prevent leaks or damage.
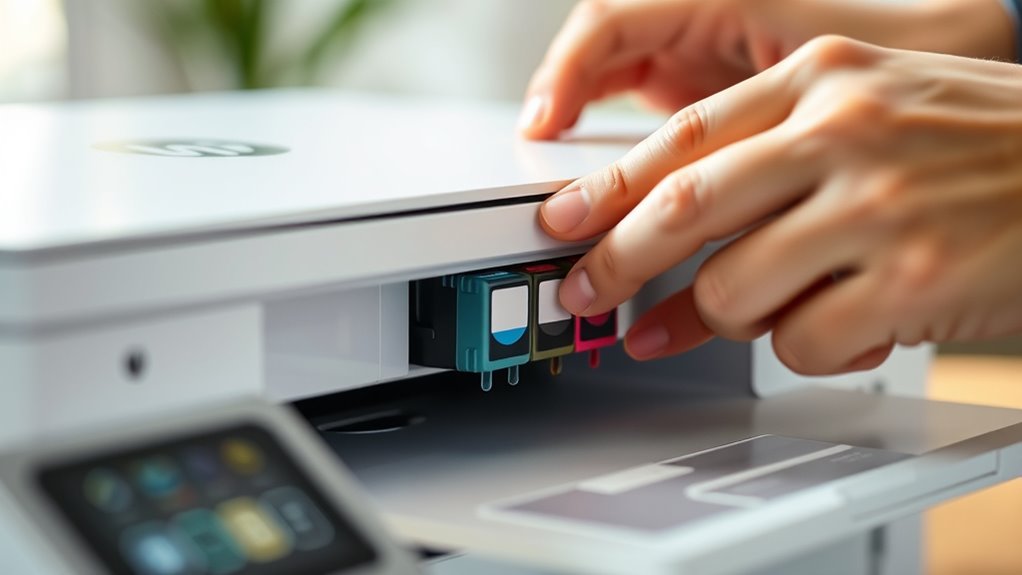
Install New HP Ink Cartridges Properly
When installing new HP ink cartridges, handle them carefully to ensure they work properly. First, take the cartridge out of its packaging and remove the protective tape, being careful not to touch the copper contacts or nozzles.
Hold the cartridge by its sides with the nozzles facing the printer. Align it with the correct color-coded slot in the cartridge carriage. Then, slide it in at a slight upward angle until it clicks into place, making sure it’s securely seated and properly aligned.
This helps prevent print quality issues. Once installed, gently close the printer cover so the printer can recognize the new cartridge. Wait for the calibration process to finish before printing a test page to check that the ink flows correctly and the cartridge is installed properly.
Close the Access Panel and Confirm Cartridges Are Secure
Make sure you gently close the access panel until it fully latches into place.
Confirm each cartridge is securely clicked into its slot by pressing down until you hear a click.
Finally, check that the panel is aligned properly and no obstructions prevent it from closing completely.
Ensure Cartridges Are Locked
After installing your cartridges, make sure the access panel is fully closed until it clicks into place. This ensures the cartridge is properly seated and securely fastened in its slot.
An unlatched or partially closed access panel can cause recognition errors or printing issues. To confirm the cartridges are fastened:
- Verify each cartridge clicks into its designated slot.
- Gently press down on the access panel to ensure it’s latched securely.
- Double-check there’s no debris or objects preventing the panel from closing fully.
A properly secured access panel keeps the cartridges firmly in place and prevents printing problems. Always confirm the panel is fully closed and latched to avoid issues caused by an unlatched or loose cartridge.
Proper fastening guarantees your printer functions smoothly.
Confirm Proper Cartridge Placement
Once you’ve confirmed the cartridges are locked into their slots, gently close the access panel, making sure it clicks into place. This step confirms that each cartridge is properly installed and fully seated.
Check that the cartridges sit flush with the carriage and are aligned correctly in their color-coded slots. Applying light pressure helps verify they’re firmly locked in, preventing miscommunication with the printer.
Proper placement ensures the printer recognizes the ink supply and avoids errors. Use the table below to guide your checks:
| Cartridge Type | Proper Seating Indicator |
|---|---|
| Color cartridge | Clicks into place, flush with carriage |
| Black cartridge | Fully seated, aligned correctly |
| Installed correctly | No movement when gently pressed |
| Recognition issue | Not recognized if not seated properly |
Confirming proper cartridge placement protects your printer’s performance.
Close Panel Gently
How do you guarantee the access panel closes securely without causing damage? You should gently lower the cover until it clicks into place, avoiding force that could harm hinges or latches. Before closing, double-check that all cartridges are firmly seated in their slots to prevent misalignment or recognition errors.
Once you close the panel, ensure no cartridges are loose or protruding, as this can affect print quality or trigger error messages. Avoid forcing the panel shut; if you feel resistance, recheck the cartridge placement and alignments first. After closing, verify that the panel is flush and fully closed to maintain proper printer operation and prevent paper jams.
- Gently close the panel until it clicks securely.
- Confirm cartridges are firmly seated before closing.
- Ensure the panel is flush and fully closed.
Run Printer Alignment and Calibration After Replacing Ink
When you’ve replaced the ink cartridges in your HP printer, it’s important to run an alignment and calibration to guarantee ideal print quality. Your printer may automatically perform a brief alignment, which can take a few minutes.
Some models prompt you to print an alignment page manually. Just follow the on-screen instructions or press “OK” to start.
Before doing a manual calibration, make sure your printer is on and has finished any initial calibration. To run a manual alignment or calibration, go to the maintenance menu through the printer software or control panel.
Then select “Align Printer” or “Calibration.” Regularly doing these steps after replacing ink helps maintain great print quality, color accuracy, and proper cartridge recognition.
This way, your printer will keep performing at its best.
Troubleshoot Ink Installation or Recognition Issues
If your HP printer isn’t recognizing a new ink cartridge, start by making sure the cartridge is properly seated. Push it in until you hear a click, which confirms it’s installed correctly.
Next, check the electrical contacts on both the ink cartridge and inside the printer. Clean them with a lint-free cloth to help improve recognition.
Clean the electrical contacts with a lint-free cloth to enhance ink cartridge recognition.
Make sure the ink is compatible with your printer model by verifying part numbers or checking the compatibility list.
If recognition issues still happen, try performing a reset or power cycle to prompt the printer to detect the ink.
Also, consider updating or reinstalling your printer driver software to ensure you have the latest firmware, which can fix recognition problems.
Verify that the ink cartridge matches your specific HP model.
Perform a printer reset or power cycle if needed.
Update or reinstall your driver software for the best results.
Maintain Your HP Printer for Optimal Ink Performance
Maintaining your HP printer is key to ensuring your ink performs well and your cartridges last longer. Regularly checking ink levels helps you refill before they’re completely empty, preventing air bubbles and keeping print quality consistent.
Taking good care of your cartridges, like using genuine HP ink and following the manufacturer’s instructions, helps ensure proper ink flow and reduces the chances of clogs or damage. Periodically cleaning printhead contacts and nozzles with a lint-free cloth keeps ink delivery smooth and your prints sharp.
Store cartridges in a cool, dry place away from sunlight to prevent ink from drying out or leaking. Routine calibration and cleaning cycles, as recommended by HP, help optimize ink performance and extend your cartridges’ lifespan for the best printing results.
Tips for Storing and Handling HP Ink Cartridges
Proper storage and handling of your HP ink cartridges are key to keeping them in good condition and ensuring the best print quality. Keep your cartridges in a cool, dry place between 15°C and 25°C to prevent ink from drying out or leaking.
Store cartridges in their original packaging or an airtight container to protect them from air and dust, which can clog nozzles. Handle them carefully by the sides, avoiding contact with copper contacts and nozzles to prevent damage and ensure proper ink flow.
When you’re not using them, store cartridges upright to avoid leaks or uneven settling. Make sure to replace or refill cartridges promptly when ink runs low to prevent long-term drying or clogs in the printheads.
- Keep cartridges in airtight containers to preserve ink quality
- Handle with care to prevent damage to nozzles and contacts
- Store upright to avoid ink leaks and uneven settling
Frequently Asked Questions
How Do I Put Ink in My HP Printer?
To put ink in your HP printer, turn it on and open the ink cartridge access door.
Remove the old cartridges by pressing their latches, then prepare the new ones by removing packaging and tape.
Insert the new cartridges into the correct color slots, pressing firmly until they click.
Close the door, and the printer will recognize the new ink and perform any necessary calibration automatically.
How Do I Connect My HP Deskjet 2852E to Wi-Fi?
Think of connecting your HP Deskjet 2852e to Wi-Fi like opening a secret passage. Turn on your printer, then press the Wireless button until the light blinks, signaling setup mode.
On your device, select the printer’s network, usually starting with “HP-“. Use the HP Smart app or setup utility to follow on-screen prompts.
Confirm the connection by printing a network page or checking the wireless status.
How to Properly Insert an Ink Cartridge?
To properly insert an ink cartridge, hold it by its sides with the nozzles facing the printer. Remove any protective tape from the contacts and nozzles.
Open the printer’s access door, ensuring it’s powered on. Align the cartridge with the color-coded slot and gently slide it in at a slight upward angle until it clicks into place.
Close the door securely, and let the printer recognize and automatically align the new cartridge.
How to Reset HP Printer With New Ink?
To reset your HP printer with new ink, you want to give it a fresh start. Turn on your printer and open the cover to access the cartridges.
Then, press and hold the reset button or a combination like Power and Cancel for about 10-15 seconds. Let go, and the printer will restart.
Check the display to confirm the reset, then run a test print to make sure it recognizes the new ink properly.
Conclusion
Now that you’ve replaced your HP ink, imagine your printer humming smoothly, ready to bring your ideas to life with vibrant clarity. With careful handling and proper maintenance, your printer becomes a reliable partner, always prepared to craft your next masterpiece.
Think of each ink refill as fueling a creative journey, turning blank pages into colorful stories. Keep your printer happy, and it’ll continue to serve you with crisp, flawless prints for many pages to come.
Properly refilling your HP printer with ink ensures it performs at its best. When you follow the right steps, you’ll enjoy vibrant, high-quality prints every time.