8 Simple Steps to Change Ink in Your Epson Printer
Dealing with low ink or a printer that refuses to print can be really frustrating. Many people struggle with changing ink in their Epson printers, especially if they’re new to the process. But don’t worry—you’re not alone, and with a little guidance, it’s easier than you think.
To change ink in your Epson printer, start by finding the right cartridges for your model and gathering gloves, a cloth, and a screwdriver. Turn on the printer and open the cartridge area carefully. Remove the old cartridges, then gently shake and prepare the new ones, removing any protective tabs.
Insert the new cartridges firmly, close the cover, and run the ink charging and calibration processes. Afterward, print a test page to make sure everything works smoothly—learn more about perfecting the process below.
Key Takeaways
- Turn on the printer and open the cartridge cover after it initializes.
- Remove old cartridges by releasing the clips. Handle them carefully to avoid any damage.
- Shake the new cartridges 4-5 times. Then, remove the protective tabs and expose the vent hole.
- Insert the new cartridges firmly into the matching color slots until they click into place.
- Close the cover, run the maintenance cycle, and print a test page to make sure everything is installed correctly.
Find the Right Ink Cartridges for Your Epson Printer
Before you start changing the ink, make sure you find the right cartridges for your Epson printer. First, check your printer’s model number—that way you know you’re buying the correct ink cartridges made for that specific model.
Look at the labels on your current cartridges to see what ink type and model number you need for replacement. You can also refer to your printer manual or visit Epson’s official website for the recommended ink cartridge part numbers.
It’s best to choose genuine Epson ink. Using authentic cartridges helps prevent compatibility problems and ensures the best print quality. Avoid third-party or remanufactured cartridges to stay clear of potential issues.
Gather Your Supplies and Prepare Your Workspace
Start by gathering the correct ink cartridges for your Epson printer to make sure they’re compatible. Find a clean, flat workspace free of dust and clutter so everything stays tidy and safe.
Next, collect essential tools like gloves, a lint-free cloth, and a small screwdriver if you need one before you begin. Having everything ready will make the process easier and smoother.
Collect Necessary Ink Cartridges
Have you gathered the correct ink cartridges for your Epson printer? Make sure they are compatible and genuine, designed specifically for your printer model. Check the packaging to verify you have the right cartridges to avoid any issues during replacement.
Before starting, turn on your printer and open the cartridge cover to access the ink cartridges. Keep a soft cloth or lint-free tissue nearby to clean contact chips or wipe up any ink spills.
Wearing gloves or washing your hands helps prevent ink stains and keeps the cartridges and printer clean. Having the right ink cartridges ready and your workspace prepared ensures a smooth replacement process.
This way, you can minimize errors and save time during your printer maintenance.
Clear and Organized Workspace
Creating a clean and organized workspace is key for a smooth ink replacement. A tidy, well-lit area helps prevent dust from contaminating the cartridges and keeps you focused.
Before starting, gather all the supplies you need—new ink cartridges, gloves, a lint-free cloth or Q-tip—and keep them within easy reach. Clear a flat surface near the printer for quick access and handling.
Make sure to turn off and unplug the printer before opening the cover. This helps avoid electrical hazards and ink leaks. Keep cartridges in their original packaging or upright to prevent ink from drying out or spilling.
An organized workspace not only speeds up the process but also reduces mistakes. It helps you handle cartridges properly and complete your ink change efficiently.
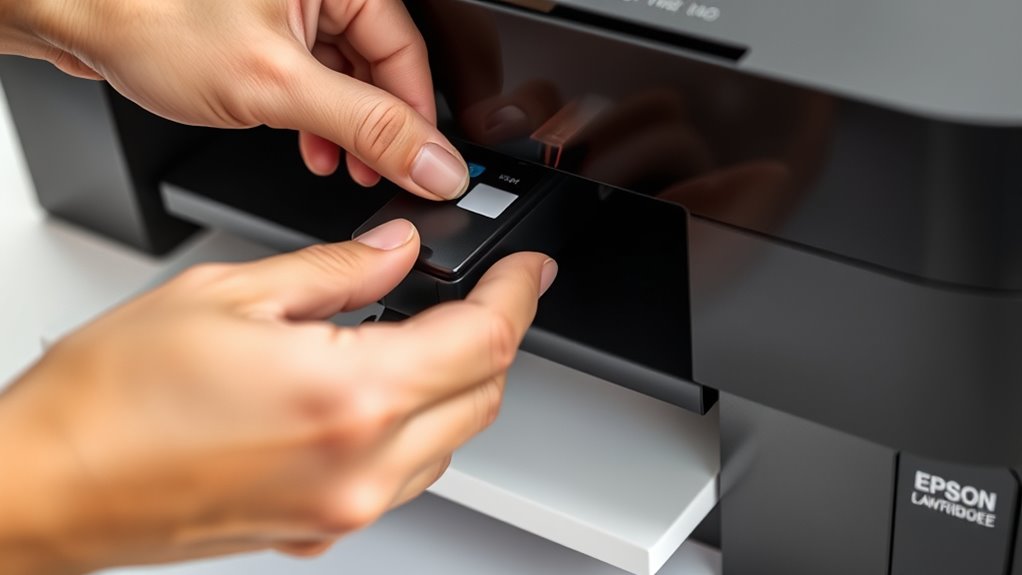
Turn on Your Printer and Open the Cartridge Area
Ever wonder why it’s important to turn on your Epson printer before opening the cartridge area? Turning on your printer makes sure it’s ready for maintenance and can recognize the ink levels properly.
Once it’s powered on, open the cartridge area by lifting the scanner bed or cover—this depends on your model. Wait until the printer fully initializes and stabilizes to prevent any damage or misalignment when handling the cartridges.
Finding the cartridge area, usually at the front or top, is key for a smooth process. Handle the printer carefully to avoid damaging internal components. Turning it on first helps the printer prepare for ink replacement and ensures safe access to the cartridges.
This step is really important for proper setup and making sure the ink change goes smoothly.
Carefully Remove the Old Ink Cartridges
Are you ready to remove the old ink cartridges? Carefully handle the removal process to avoid damage. Gently lift the scanner or cartridge cover to expose the cartridges without forcing anything.
When you’re ready, squeeze or press the tab or clip holding the old cartridge and lift it straight out of its slot. Remember to handle the cartridge by its edges, avoiding contact with the gold contact points or nozzles to prevent damage.
Once removed, dispose of the old cartridges properly, following environmental guidelines. Handling this step with care keeps your printer in good shape and helps protect the environment.
Be patient and gentle. This small act makes a big difference in the overall ink-changing process. Your careful handling ensures smooth operation and responsible disposal.
Shake and Prepare Your New Cartridges
Did you know that shaking your new ink cartridges properly can help guarantee smooth ink flow right from the start? Before installation, gently shake each cartridge 4-5 times to activate the ink.
Remove the yellow tab on each new cartridge to expose the vent hole. This helps ensure proper ink flow during use. Handle the cartridges carefully by their sides to avoid damaging the gold and green contact chips, which are essential for ink recognition.
Make sure the new cartridges are face up on a clean surface in the correct order: Cyan, Magenta, Yellow, and Black. Avoid touching the green contact chip or ink port, as damage can interfere with activation.
Properly prepared cartridges will ensure a smoother installation process and reliable ink flow from the moment you start printing.
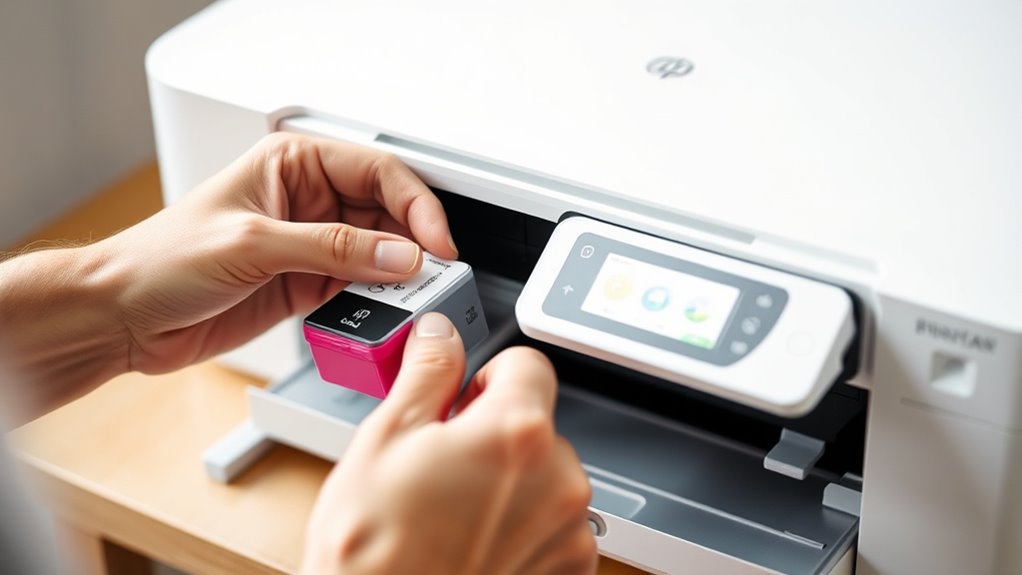
Insert the New Cartridges Properly Into Your Printer
Once you’re ready to insert the new cartridges, carefully align each one with its matching color slot in the printer. Make sure the contacts face down and the tab end lines up with the correct slot.
Push the cartridge firmly into place until you hear a click, which confirms it’s installed securely. Don’t forget to remove the yellow protective tab before inserting to expose the vent hole.
Push the cartridge firmly until it clicks, then remove the yellow tab to expose the vent hole.
Properly aligning the contacts ensures a good electrical connection, which is key for ink flow. After installation, close the cartridge cover securely until it clicks.
Then, lower the scanner or printer cover to start the ink recognition process. This step makes sure your printer recognizes the new cartridges and is ready to go.
Feel confident as each click confirms a secure, proper install. You can relax knowing your cartridges are aligned perfectly.
Enjoy the smooth, confident motion of pressing each cartridge into place. Trust in the secure contacts that help ensure flawless printing.
Run Ink Charging and Calibration Through Your Printer Menu
After installing new ink cartridges, you’ll want to run the ink charging and calibration processes.
Just access your printer’s menu, go to the Maintenance or Setup section, and choose the right options.
Follow the prompts on the screen to finish these steps. This will help ensure your print quality stays sharp and consistent.
Accessing Printer Maintenance Menu
To access the maintenance menu on your Epson printer, press the Home button on the control panel. From there, go to the Setup or Settings option, then select Maintenance or a similar submenu.
Use the arrow buttons to scroll through the menu until you find options like Ink Charging or Head Cleaning. Selecting these options starts automatic ink priming, which is important after changing cartridges.
Follow the on-screen prompts to begin the calibration process, ensuring your print quality stays high. During this process, you’ll see messages or progress bars showing the status.
These steps help you access the maintenance menu correctly for smooth ink charging and cleaning, so your printer performs at its best.
Performing Ink Charge Calibration
Performing ink charge calibration is a simple process that helps ensure your Epson printer produces high-quality prints. First, access the printer menu and go to the Maintenance or Setup options.
Next, select the Ink Charge or Calibration option. Follow the on-screen prompts, and the process usually takes about 2-3 minutes. Make sure your printer is turned on and the new cartridges are properly installed before starting.
Once you begin, just follow the instructions and wait for the printer to indicate that the calibration is complete. Confirm the process is finished, and you’re all set. Regular calibration keeps your print heads working well, ensures color accuracy, and helps prevent clogs.
Performing this maintenance regularly will keep your Epson printer running smoothly and preserve your print quality.
| Step | Action |
|---|---|
| 1 | Access printer menu and select Maintenance |
| 2 | Choose Ink Charge or Calibration option |
| 3 | Follow on-screen prompts and wait |
| 4 | Confirm completion and finish |
Print a Test Page and Troubleshoot Common Issues
Once you’ve replaced the ink cartridges, printing a test page is important to make sure your printer is working correctly. This helps you spot issues like streaks, faded colors, or missing sections.
Printing a test page after cartridge replacement ensures your printer works perfectly and highlights any print quality issues.
Use the printer’s maintenance menu to select “Print Test Page” and look at the results carefully. If the print quality isn’t great, troubleshoot by doing head cleaning or nozzle checks.
Check the ink levels and make sure the cartridges are properly reseated. Sometimes, error messages or warning lights mean recognition problems. Fixing these issues can save you time and frustration.
Keep an eye out for warning signals, and don’t hesitate to perform maintenance to keep your Epson printer running smoothly.
- Feel confident in your printer’s performance again
- Quickly spot and fix print quality issues
- Save time by troubleshooting effectively
- Enjoy flawless prints every time
Frequently Asked Questions
How Do I Change Ink on an Epson Printer?
To change the ink on your Epson printer, turn it on and open the scanner or cartridge cover.
Carefully remove the old cartridge by squeezing the tab and lifting it out. Shake the new cartridge gently, then remove the yellow tape.
Press the new cartridge firmly into the correct slot until it clicks. Close the cover and wait a few minutes for the printer to recognize the new ink and finish priming.
What Ink Does Epson XP 2205 Use?
The Epson XP-2205 uses 202 series ink cartridges, including black, cyan, magenta, and yellow. You can choose between standard or high-capacity (XL) versions for each color.
Make sure to use genuine Epson 202 ink cartridges to get the best print quality and compatibility. When replacing, you’ll find the black cartridge at the front and the color cartridges behind it, making the process straightforward.
Can You Switch an Epson Printer Back and Forth for Sublimation and Regular Ink?
Yes, you can switch your Epson printer between sublimation and regular ink, but you need to be careful.
First, make sure to clean the printhead thoroughly to prevent clogs. Then, replace the sublimation cartridges with standard ones and reset the ink settings.
Some models might require firmware resets or special tools. After switching, always do a nozzle check to ensure everything prints properly and to avoid damage.
What Ink for Epson XP-7100?
You should use Epson’s genuine Claria ink, specifically the 29XL high-capacity cartridges, for your Epson XP-7100. These cartridges include black, cyan, magenta, and yellow, providing vibrant colors and sharp text.
Always make sure you’re using cartridges designed for this model to avoid recognition errors. When replacing ink, lift the scanner unit for easy access.
Carefully insert the new cartridges for consistent, high-quality printing.
Conclusion
Changing your Epson printer ink is straightforward if you follow these steps. Remember, a stitch in time saves nine. Taking care of your cartridges now prevents bigger issues later.
With patience and attention, you’ll keep your printer running smoothly and your prints looking sharp. So, don’t rush the process. A little care goes a long way.
Before you know it, you’ll be back to printing with vibrant, crisp results using your Epson ink.